Showing posts with label homemade. Show all posts

Friday, October 4, 2013

Pumpkin Chocolate Chip Cookies


Can you believe we’re in the first week of October already?!  Where has the year gone?  I certainly won’t complain.  It’s been a great year thus far and I’m happy to welcome the fall season.  I’ve never lived in an area that experiences a full change of seasons, but I still get excited at the thought of holidays being just around the corner, gathering with friends and family over really great food, activities such as pumpkin carving and running through a corn maze, sipping on hot tea and warm apple cider, and pulling out all of those yummy spiced baking recipes.  Fall is just so warm, friendly and cozy - what’s not to like?

Over the years I’ve become known for my Pumpkin Chocolate Chip Cookies (PCCC).  Come fall, it’s almost expected that I bake a batch for any social gathering.  A few years ago, my bridesmaids even went out of their way to make a batch for my bridal shower (in October) because they knew I loved them so.  I know...pumpkin and chocolate?  That was my first thought too.  But trust me on this one, these are so scrumptious!  They’re a little less like a cookie and more like a bread, but in perfect little bite sized portions.  Seriously, so good.  

Turning my original recipe into a gluten free recipe was a bit tricky, but I’ve had 3 years to perfect it and think I’ve found a suitable flour to substitute for a fabulous gluten free PCCC.  That said, let the baking begin!  What better way to get into the fall spirit, than by baking with a little pumpkin?


Pumpkin Chocolate Chip Cookies

1 1/2 C Canned Pumpkin
1 C White Sugar
1/2 C Canola Oil
1 Egg
*2 C of "Cup4Cup Gluten Free Flour" (from Williams Sonoma)  
2 t Baking Powder
2 t Ground Cinnamon
1 t Pumpkin Pie Spice (I use Trader Joe’s - otherwise a dash of ground nutmeg, ground ginger, allspice and a little lemon zest works nicely too)
1/2 t Salt
1 t Baking Soda
1 t Milk
1 t Vanilla Extract
2 C Semisweet Chocolate

  1. Preheat oven to 350 degrees F (175 degrees C).  Dissolve the baking soda with the milk and set aside.
  2. In a mixer combine pumpkin, sugar, vanilla, canola oil and egg.  Mix until smooth.
  3. In a separate bowl, whisk together flour, baking powder, ground cinnamon, pumpkin pie spice and salt. Add baking soda mixture.
  4. Slowly add dry ingredients with wet until completely mixed. (Be careful not to over mix.  This is easy to do when using gluten free flours.)
  5. Fold in chocolate chips.
  6. On a parchment lined baking sheet, drop by spoonful and bake for 10 minutes or until lightly brown and firm.
  7. Let cool and enjoy!
*I also had great results with the Pamela’s Baking Flour.  These two flours gave me the best results.  I did try several different flour combinations (rice, tapioca, coconut, etc) but was sorely disappointed.  
**If using regular wheat flour, do 1 C Canned Pumpkin and 2 C Baking Flour.

I can't wait to hear what you think!  Happy Fall!


Tuesday, May 28, 2013

Food : Mocha Frappuccino


I've been on a no sugar diet with a girlfriend of mine and with all of this warm weather, a Starbucks Mocha Frappuccino is awfully tempting {but loaded with sugar}.  So I set out to create a "healthy" frapp of my own, and I'm so happy to say I succeeded!  

{I now wake up looking forward to my morning Mocha Frappuccino}


Mocha Frappuccino

  1. A Handful of Ice
  2. 1 Fresh Banana
  3. 1 Scoop Chocolate Protein Powder 
  4. 1 Shot of Espresso {or a highly concentrated amount of plain brewed coffee, or a 1t of instant coffee will do}
  5. 1/2 C Vanilla Coconut Milk
  6. 10 Dark Chocolate Chips
Combine all in a blender, blend and enjoy!!  

{Oh, and if you're really looking for a treat, top with your favorite whipped cream....I won't tell.}


XOXO

Friday, December 14, 2012

Herbal Honey : A Homemade Christmas Gift Made with Ease and Love

Hi Friends!  Melanie here, I have an easy DIY Christmas gift to share with you today!


The parties, the eggnog, the gifts, JESUS -- Christmas is such a beautiful time of year.  For me, what often gets in the way of the holiday sparkle is long shopping lines, grumpy grinch crowds, and dare I say it, burnt cookies.  It can often be a time when wonder and chaos unite and never leave our side until the credit card bills come in January.

Wouldn't it be great if you could make a gift from home that someone could actually use? Better yet, what if you didn't have to go shopping for the ingredients?! 


I made 6 of these tasty treats in 15 minutes all with ingredients and supplies I had in my pantry.  Homemade gifts don't have to be time consuming or require hard to get ingredient!

Flavored Honey

You have honey in your cupboard, right?  However you eat or drink honey, it is possible to enhance the medicinal qualities by adding herbs to it.  You heard me right, that underused, overflowing spice rack is about to get functional.  Herbal honeys are easy to make and substitute into almost any capacity that you use honey.  Your almond butter and honey sandwhiches will never be the same.  Drizzle over muffins, add to tea, top your waffles, or eat herbal honey straight out of the jar.  You can even use them as a barbaque glaze.  C'mon I'll show you how!


   After I washed and dried all of my glass jars, I added my spices and herbs to each jar. 


I heated the honey slightly until it was warm and runny.  Make sure it doesn't boil.  Next, I poured honey into each jar. 


I stirred each jar well and placed the lids once I let them cool.  Christmas gifts, done.  Store them in a cabinet for two weeks so the flavors can mingle, and your cute little presents are ready!  I've used mine before two weeks and they were still delicious, so if you're reading this on Christmas Eve, it's not too late.


You can find corresponding recipe cards for each herbal honey blend here and here to be included with your gift.
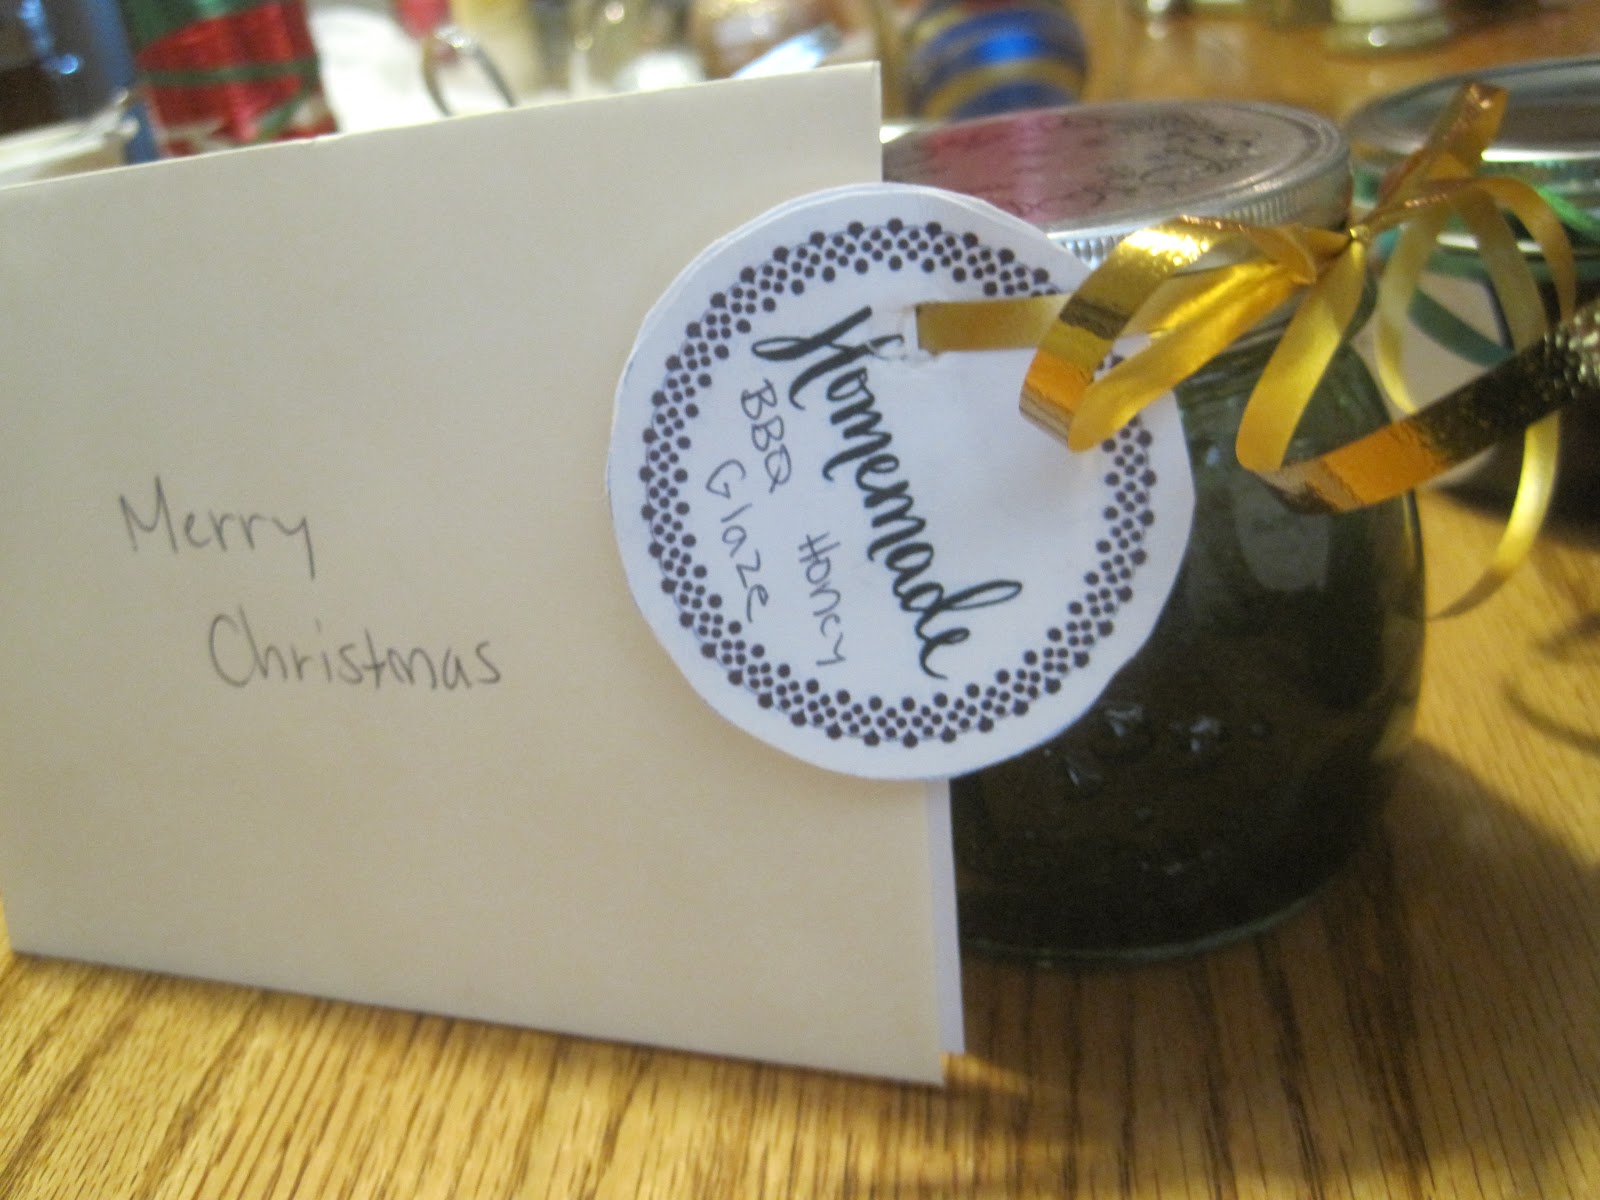
You can find the circular labels here.
My jars were from World Market, but any glass jar with a lid that holds one volume cup will do.


You will find the recipe for each herbal honey blend below. Choose 1, all 4, or create your own blend for a unique treat this Christmas.  You could simply make a rosemary honey or a cinnamon honey as long as you powder your herbs the possibilites are endless! The basic ratio to follow is 1/4-1/2 cup dried herbs or spices to 1 cup of honey.  All recipes below are adapted from Kami McBride's The Herbal Kitchen.
 

Barbeque Honey Glaze

Spread on chicken, skewered veggies, or fish before baking or grilling.

1 cup honey, warmed
1 T powdered ginger
2 teaspoons powdered rosemary
2 teaspoons powdered thyme

Powder your herbs in a spice grinder if they are still whole.  It will still be the same measurement above.  Add to a clean jar and stir well. Pour warmed honey over herbs and stir well. Allow to cool, then close tightly.

Spiced Honey

You will never be the same after trying this honey.  It tastes like a cinnamon roll.  Fabulous in tea or spread on pancakes, the possibilities are endless. 

1 cup honey, warmed
1 T powdered cinnamon
2 teaspoons powdered ginger
1/2 teaspoon ground cloves or allspice


Powder your herbs in a spice grinder if they are still whole. It will still be the same measurement above. Add to a clean jar and stir well. Pour warmed honey over herbs and stir well. Allow to cool, then close tightly.
.
Flexibility Honey

Perfect for a family member that suffers from arthritis.  This blend is packed with herbal anti-inflammatories.

1 cup honey, warmed
1 T powdered tumeric
1 teaspoon powdered ginger
1/2 teaspoon powdered juniper berries (no juniper berries? try powdered black pepper)
1/2 teaspoon powdered cardamom

Powder your herbs in a spice grinder if they are still whole. It will still be the same measurement above. Add to a clean jar and stir well. Pour warmed honey over herbs and stir well. Allow to cool, then close tightly.

Poultry Glaze Honey

Sticky sweet barbeque chicken.  Makes you wonder what is in those jars of BBQ glaze at the store, doesn't it?

1 cup honey, warmed
1 T powdered coriander
1 teaspoon powdered paprika
1 teaspoon powdered cumin
1 teaspoon powdered tumeric
1/2 teaspoon powdered thyme
1/2 teaspoon powdered clove
1/2 teaspoon powdered celery seed

 Powder your herbs in a spice grinder if they are still whole. It will still be the same measurement above. Add to a clean jar and stir well. Pour warmed honey over herbs and stir well. Allow to cool, then close tightly.

I hope you will give this easy project a try as homemade gifts for others or to use in your own kitchen.


Merry Christmas, from my family to yours!

-Melanie
The Grecian Garden

- all images via Melanie 
{please ask to reproduce, or properly link if you desire to share via your own blog}

Tuesday, August 28, 2012

Home : DIY Terrariums


So you know those cute little succulent terrariums we're seeing all over Pinterest these days?  Well, I couldn't resist making one {or three} for myself.  Who doesn't love a pretty little plant pristinely layered in a pretty little jar?

This was such an easy and quick project, but I learned a few things along the way and thought I'd share...


You'll need :
- A jar {mason jars are adorable, or fancy jars/vases work, fish bowls are cute too!  I recycled a few salsa jars and found a fun fancy one at Marshalls.}
- Pebbles {found at a home improvement store or a pet store if you want different colors}
- Soil {make sure it's suitable for succulents}
- Activated Charcoal {found in pet stores, in the fish department - activated carbon is the same thing}
- Spagnum Moss {optional, also found at a home improvement store}
- An Assortment of Succulents {cuttings will work too, if you already have succulents around your yard. Cut them, trim the leaves around the base of the cutting and lay out to dry for 2-3 days.}
     - Rooting Hormone {home improvement store - but only needed if using succulent cuttings}


{ignore the bobby pins, those were for another project}
Assemble :
  1. Clean your jar and make sure no soaps or chemicals remain.
  2. Layer in this order :
    1. Pebbles
    2. Activated Charcoal
    3. Soil
  3. Now you're ready to arrange your darling succulents - if using a cutting, dip the tip in water and then coat in rooting hormone before planting.
  4. Top with moss.
You have a terrarium!  Easy right?


{layer}

{dip}

{arrange}

{voila!}


I will say this little project can get expensive if you don't have many of these things on hand.  I suggest going halvsies with a friend and doing it together - you'll most likely have plenty of supplies to make several terrariums.  Plus projects are better with girlfriends anyway, right?

Link up if you have made terrariums in the past...would love to see!

I'll be happy to answer any questions you may have as well {if I can}. :)

Happy planting!!

Wednesday, August 1, 2012

Food : Elderberry Syrup & Foods That Heal


My journey to heal my body was long, discouraging, and expensive.  In trialing hundreds of medical, natural, and folklore remedies to get well, I discovered breakthroughs but many setbacks about what truly has a positive benefit to health.  One of the natural remedies I was once convinced would cure my every ache was a sweet tasting powder taken with oxygenating water drops.  No luck with that one.  I experienced points of hopeless desperation and spent a lot of time on my knees seeking God for answers. Although my healing wasn't instantaneous,  I had a peace that God would lead me to what would heal me.   Through a journey I will never forget, God showed me which foods, herbs, alternative medicine techniques, and dietary models were in alignment with what He created to be beneficial to our bodies.

    One very important thing I learned on my journey is:

The most healing foods can be made in your own kitchen.

Think of your pantry, freezer, and refrigerator as a first line of defence when sickness hits.  Make garlic tea, take a spoonful of elderberry syrup, pull some homemade stock out of the freezer for soup.  Don't have any of those staples made?  Now is your opportnity to begin turning your kitchen into a virtual medicine chest.

Here are 3 easy steps to get you started.

  
1. Homemade broth:

                           {Beef broth labeled and dated ready to be refrigerated or frozen for later use.}   

Next time you buy a rotisserie chicken, toss the meat picked carcass in the crockpot with veggie scraps and cover with water.  Cook it on low for 8-12 hours while you sleep.  The next morning strain the broth, trash the scraps and put the broth in jars to be refrigereated or frozen.  Soup can now be ready in 20 minutes once you have this step down. You can also make broth by simmering the bones and veggie scraps on the stove top as well.   During the week while I'm cooking, I save vegetable scraps in a ziplock bag just for broth making.  Examples include the tops and bottoms of carrots, celery, onions, garlic, or parsley.  You can also buy stock bones from your butcher or local grocery store.  Bones from organic fed animals such as grass-fed beef and pastured chickens will provide an even more nutrient dense broth than conventionally raised animals.

Chicken, beef, or fish broth is rich in minerals such as calcium, phosphorus, silicon, magnesium, and sulfur. It also contains trace minerals that are easy for the body to absorb. Broth also has natural gelatin and collagen which are excellent for healing inflammation in the body as well as making your skin look beautiful. The glycine in the gelatin has even been shown to help with liver function.  Store bought broth does not have the same healing effect as the homemade variety, so whip up a batch on the weekend so you can have broth throughout the week or frozen for a later use.

       
2.  Garlic Tea

  As for garlic tea, I make it any time anyone in the house gets the slightest sniffle or upper respiratory tickle.  I've been known to drink 2-3 cups a day when I feel a cold coming on or when my co-workers have all come down with something.  Surprisingly though, it does not taste like garlic: the lemon juice takes over and it tastes like lemon water with honey.  This tea is not only great for viral infections but it is also anti-bacterial, anti-fungal, detoxifying, and calms the digestive system.  Once made though, it doesn't keep for more than 2 days in the fridge.  Drink up and share with the family!  Here's an easy recipe that can be made in 20 minutes.

3. Elderberry Syrup {Recipe below}:

Elderberry syrup is great to have on hand to prevent colds, sorethroats, or any virus. It is both anti-inflammatory and an antioxidant. You can buy elderberry syrup made with honey at the local healthfood store (I won't tell), but it is much cheaper to make st home. Take one to two teaspoons at the first sign of a cold, sore throat, flu or other viral illness.  You can also take 1 tsp daily as a prevention.   This is a staple to have in your healing kitchen repertoire.   I found fresh berries at our farmers market but you can also buy them dried here. This tonic is great for kids too, provided they're not babies under one year of age.


The above ideas are easy entry level ways to begin using your kitchen as a medicine cabinet.  We can choose to heal with every morsel that crosses our lips.  It's really that simple.  Besides, your great grandmother would approve.


Elderberry Syrup


I had two cups of fresh elderberries, so I left one batch plain and added sliced fresh ginger to the second.  Either way you make it, this is one immune boosting tonic!

- 1 cup fresh or 1/2 cup dried elderberries
- 1/2 inch slice fresh ginger (optional)
- 3 cups water
- 1 cup raw local honey


  1. Heat the berries, ginger (optional) and water to a boil, then reduce to simmer for 30-45 minuets.
  2. Remove ginger.  Mash the berries, strain, and add honey. 
  3. Bottle and store.  Keeps in the refrigerator for 2-3 months.

What else can you do with Elderberry syrup besides taking it each day as a flu prevention or taking it at the onset of a cold?

  • A sorbet base
  • Ice cream topping
  • Drizzled on your pancakes
  • Add a few tablespoons to frosting for cupcakes.
  You can also make this refreshing lime and elderberry cooler!


Elderberry & Lime Cooler
Serves 1 {can be doubled, or tripled}

- 3 tsp Elderberry syrup
- 3 drops stevia {or 1 tsp honey}
- 1 tsp lime juice
- 1 cup water
- Ice Cubes

  1. Combine all ingredients in a 4 ounce tumbler, stir, and enjoy!

I'd love to hear from you!  Leave a comment below telling us what steps you have done to make your kitchen/home a healing place. 
- Melanie

This post linked with Slightly Indulgent Tuesday, Allergy Free WednesdayHearth and Soul Hop,and Keep it Real Thursdays.


- images via Melanie

Wednesday, July 25, 2012

Food : 10 Minute Baked Potato

So a few days ago I had a hankering for a baked potato.  I remembered that beautiful sweet potato I bought over the weekend and thought I'd make myself a sweet savory treat for lunch.  In about 10 minutes I had a glorious Maple Glazed Sweet Potato sitting on my plate!  


How did I do that?  Let me show you....

My mom shared this handy trick with me a few years ago and I haven't baked a "traditional" baked tater since!  


  1. Grab a potato. {I use russet or sweet potatoes for this method.  "Baking" time may vary according to the size of your potato.  We'll get there in a minute.}
  2. Wash it well.
  3. Poke {carefully} a few times with a knife or fork.
  4. Pop it in the microwave on high for 5 minutes.  {I do 6 or 7 minutes for a large potato...the one below was considered large.}
  5. Carefully {its hot!} and snugly wrap it in foil and let sit for another 5 minutes {again, I let it sit another minute or two if it's large}
  6. Unwrap & voila!  You have a baked potato in about 10 minutes!  :) 

For a regular russet potato, I like to drizzle olive oil and a dash of salt over the skin before I wrap it in foil.

Maple Glazed Sweet Potato


  1. Bake a large sweet potato.
  2. Slice into 1/2 in slices and stack.
  3. Sprinkle with cinnamon, nutmeg and a dash of salt.
  4. Drizzle warm maple syrup over top.


Happy "baking"!  


- images via danya collyer

Wednesday, July 18, 2012

Midweek Favorites

It's been an extra hard week for Blakely, as you can see...

{Yesterday's nap on the couch}

{"Recovering" from our walk this morning - I got out of the shower to find this}

Life is just so exhausting, I had to share. :)

In between cleaning the apt, unpacking from this weekend's women's retreat and sorting through piles of laundry, I thought I'd share two irresistible deals I came across this morning.


Are you familiar with Julep??  If not, you need to be!  Jamie from FashionistaMusings recently landed a job at Julep {a nail boutique} and she's been telling me about their program called Julep Maven.  It's a subscription service that sends two of their unreleased polishes & an extra {think lotion, scrub, nail file, etc} to your door each month for a flat fee of $19/month {which is a great deal, considering a bottle of polish runs about $14 a pop}.  As a Maven, you'll also receive a 20% discount on your purchases, free shipping and a few other perks. Fast drying, long lasting, and toxin free - who wouldn't want to wear one of their many beautiful colors??  


So here's the deal - you can try your first Julep Maven box for a penny!  {Yes, I said a penny!}  Head to Julep Maven, take their style quiz and add your Maven Box to your cart.  At checkout enter promo code : PENNY {You must be a first time Maven}. How fun is that??  My style was "Classic with a Twist" {pictured above}.  I cannot wait to receive my box and give the polish a shot!  What's your style??


My absolute FAVORITE gadget these days is my CBTL Kaldi Espresso Maker.  I love this machine.  I actually won it {I know!  Me, win something?!?!  No way!} as a giveaway from Marla's blog FamilyFreshCooking

{A homemade Coconut Milk Chai Latte}

The CBTL Kaldi is a single serve coffee maker that makes brewed coffee, brewed tea, espresso and hot chocolate at the touch of a button.  Amazing right??  It truly does make the perfect cup of coffee every time I use it.  My girlfriend & barista, Lauren, showed me how to make all of my favorite drinks, so now I make delicious lattes and macchiatos in my own kitchen every morning!  {I'm sure you've seen my instagram and twitter accounts littered with photo upon photo of beautiful homemade drinks lately....this would be the reason.}

So why am I raving about this machine?  Because it was featured on the Today Show this morning and they're offering a killer discount on it!  Retailed at $314.39, the CBTL Kaldi could be yours for $99!  Head to this page - CBTL  and enter promo code TODAYCBTL to receive the discount.

I hope you're having a wonderful week!  Would love to hear if you are a Julep or CBTL fan.  Happy Wednesday!


*FYI : I'm sharing these products with you because I love them.  This is not a sponsored post.

Tuesday, July 17, 2012

Food : Warm Summer Veggie Spaghetti with Artichoke Tapenade

While scanning the shelves at my local Trader Joes earlier last week, I found a yummy looking jar of Artichoke Tapenade.  I couldn't pass it by, so I added it to my pantry and quickly forgot about it.  Yesterday I found myself running an impromptu and very unorganized grocery run - while out, I remembered that little jar of tapenade.  Hmm?  What can I make with that?  Dinner!  I threw some veggies in the cart and headed home.

Now I know tapenade is for topping crackers and crostini, but I thought it would make a nice "sauce" for my summer veggie pasta.  I was right!  This meal turned out perfectly {and beautifully}!  Hubby thought it tasted like a dish from a fancy restaurant, and helped himself to more than one helping.  I'll definitely be making this again.  

Hope you enjoy! 

{Sorry this photo was a quick iPhone snap - next time I'll get a better pic with my Nikon.}

Summer Veggie Spaghetti with Artichoke Tapenade

1/2 lb Spaghetti Noodles, cooked according to package {I use rice, quinoa or corn noodles}
1/4 C Artichoke Tapenade {I'm sure a olive oil and garlic paste or a pesto would work nicely as well}
1 Bunch Asparagus, halved and steamed
1/2 C Cherry Tomatoes, halved
1/4 C Sliced Mushrooms, sauteed in olive oil
1 T Olive Oil
Salt & Pepper to taste
Fresh Grated Parmesan Cheese


  1. Prepare spaghetti as directed.  Meanwhile steam asparagus, and saute mushrooms.
  2. Once fully cooked, drain spaghetti.  Return spaghetti pot to stove and add olive oil, artichoke tapenade and noodles - fold till noodles are coated.
  3. Fold tomatoes, mushrooms and asparagus into noodle mixture and add salt and pepper to taste.
  4. Serve and sprinkle with parmesan cheese.  Enjoy!


-image via danya collyer.

Wednesday, July 11, 2012

Food : Tzatziki {Dairy Free}


Hi friends!

Our local farmers market has me jumping for joy every weekend with awesome new ingredients to play with.  I've been buying figs from the sweetest old lady with hopes of turning them into fig cookies or a sweet summer jam, but alas they have been eaten way too fast for any such creations.  I did manage to restrain myself from making more lacto-fermented pickles with my bounty of cucumbers so we could enjoy this versatile dip.

In case you haven't noticed, I have an obsession with turning my once beloved Greek recipes into modern healthy versions.  Its quite common during the summer to find any one member of my family chowing down on a Gyro (YEER-oh).  The Greek sandwich that changed the world is a pillowy soft flat bread wrapped around tender lamb, lettuce, tomato, onion, and slathered in Tzatziki ( dza-DZEE-kee ).  The flavor combination of the sandwich has been forever engraved in my brain even though it's been years since I've actually taken a bite.  Since swearing off gluten and dairy the gyro of my childhood would have to be just a memory.  That is, until I realized with a few tweaks to my pine nut cheese that I may be able to re-create the faint memory of the creamy garlic spread from my childhood.

Hard work pays off. 

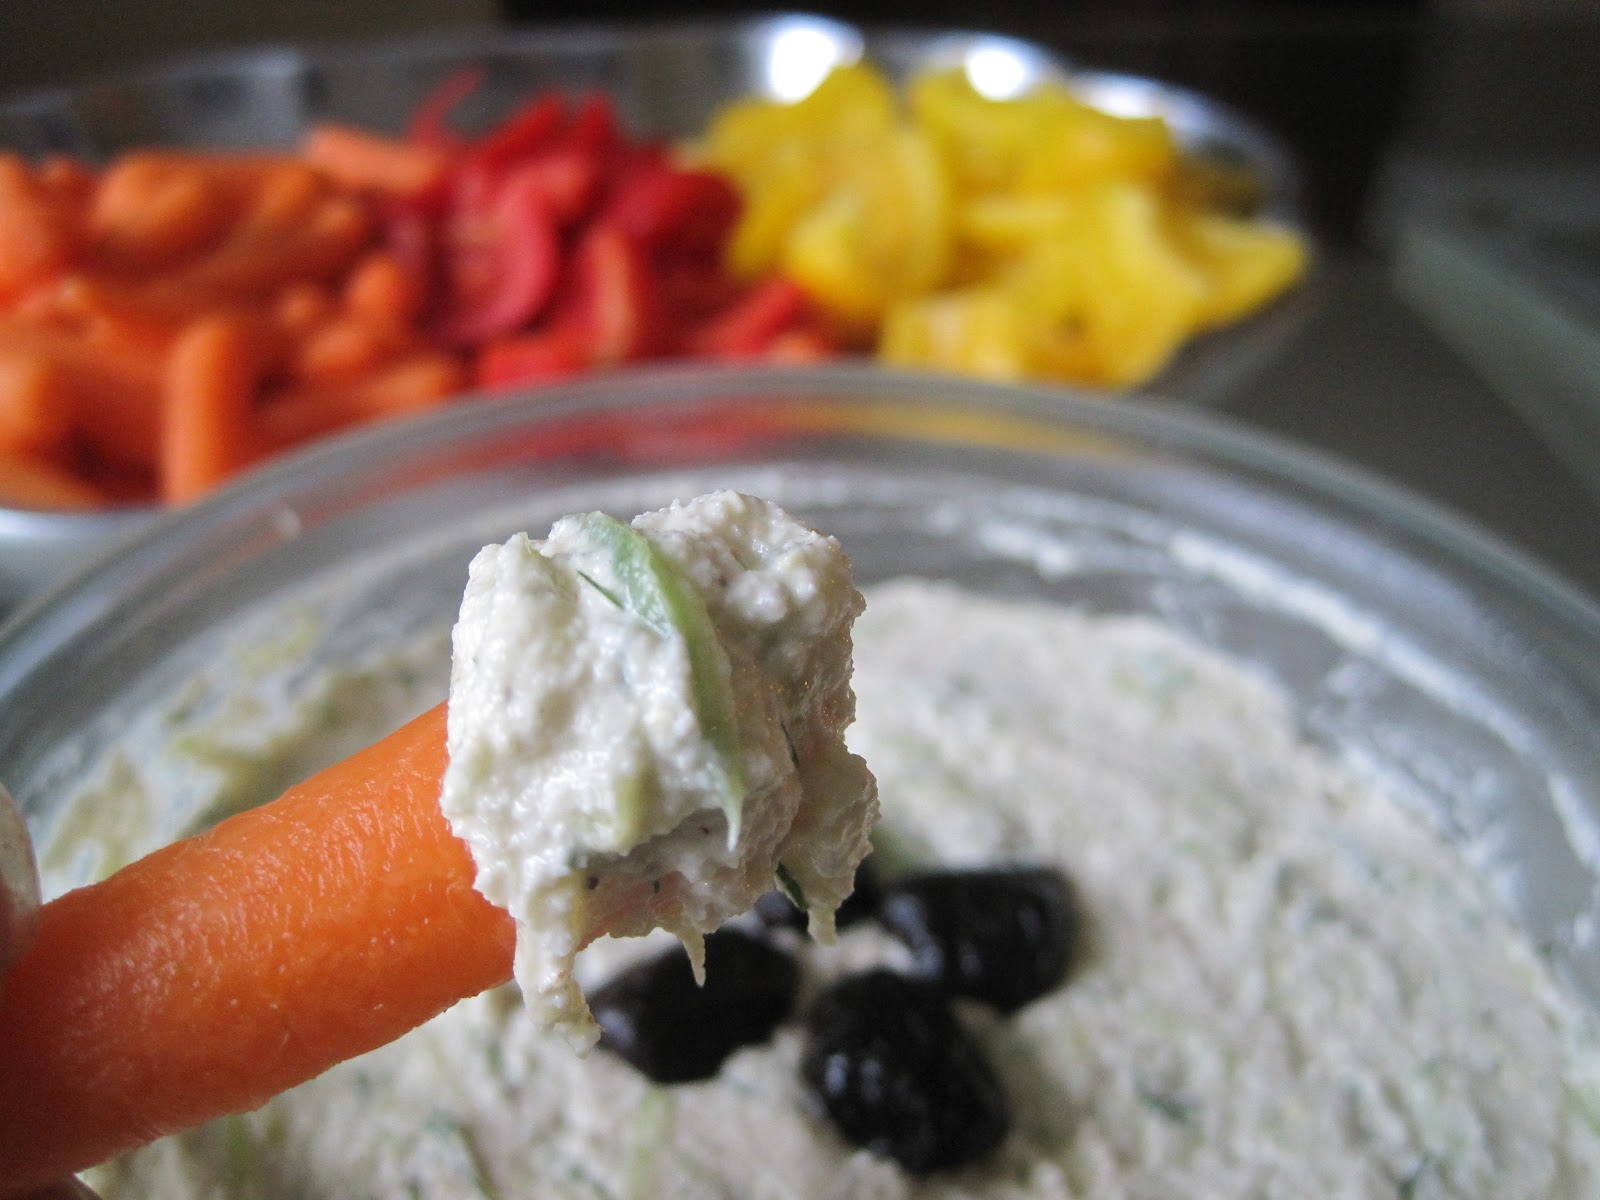
This is the dip dreams are made of.

Tzatziki

This creamy garlic dip can be a great vehicle for eating more veggies.  It goes great with chips too, although my favorite use is spreading it onto sandwiches or adding a dollop to the protein of your choice.  

 2 medium seedless cucumbers, peeled and grated (about 2 cup)
1 1/4 cups pine nuts
 2 garlic cloves
1 T olive oil
2 T freshly squeezed lemon juice
1/2 tsp salt
1 T chopped fresh dill
kalamata olives for garnish

1.  Soak pine nuts in cold water for 20 minutes. Sprinkle grated cucumbers with a few teaspoons of salt  until some of the liquid is released. Squeeze any excess moisture from grated cucumber w/ a kitchen towel and add to a medium sized bowl.
2.   Rinse pine nuts and add to bowl of food processor along with garlic, olive oil, lemon juice, and salt.  Puree until well blended, adding more lemon juice to help the food processor along if needed.  Taste and add salt, lemon, or pepper to your liking.
3.   Stir pine nut dip and dill with grated cucumbers and chill until ready to serve.  Top with kalamata olives (optional) 


Delish!  Enjoy!

- Melanie


Thursday, May 31, 2012

Home : Color Dipping

Bold bright colors are EVERYWHERE this year and I LOVE it!  While color blocking has stormed the fashion world, color dipping is making it's impression on the home decor & DIY world.  A clean line of color can so easily {and affordably} bring an old piece to life again.  Take a look...


1 | 2 | 3 | 4 | 5 | 6 | 7 | 8 | 9 | 10 | 11 | 12 | 13

I may just have to color dip something this weekend. :)

Do you like the trend?  Have you color dipped anything in your home??  Would love to hear about it!

Don't forget to enter our giveaway!


Related Posts Plugin for WordPress, Blogger...
©Pink Peony Style - Designed by BDD