Showing posts with label How to. Show all posts

Friday, May 31, 2013

In Full Bloom - Building A Table Arrangement


As a flower lover, spring is naturally one of my favorite seasons.  And one of the most lovely things about living on the West Coast is the array of flowers so readily available at the local markets and grocery stores.  It's a bit dangerous for me actually. Just ask my husband...I'm totally the girl that swoons over the buckets of freshly cut flowers - sometimes he has to drag me away and remind me what we're actually shopping for.  Bad, I know.
Anyhow, I worked at a flower shop for a bit in high school and took a few floral arranging classes, and have also worked with a few brides to create their one-of-a-kind bouquets, boutonnieres and corsages.   So I admit, my floral knowledge and experience may be greater than that of the average homemaker, but building an arrangement doesn't have to be difficult or intimidating.

So I thought I'd share a few tips for building a simple, but stunning table arrangement.
  1. Choose a vase appropriate for your table. 
    • If your arrangement is for a dining table, try to keep your arrangement low so your guests can see above it.  
    • If for a night stand or bathroom sink, I like to use mason jars.
    • And for my coffee table, I tend to like short vases with wide openings {I actually use a short drinking glass I found at a thrift store}.  
    • Keep in mind, the wider the opening of your vase, the more buds you will need to fill it.
  2. Pick a flower and stick with that one type of flower.  Be sure to buy enough to fill your vase. 
    • I love garden roses, anemones, or peonies to name a few.  
    • Gerber Dasies and Hydrangeas are great at making a statement as well.
  3. Arrange.  Run a stream of cold water in your kitchen sink and with sharp scissors or garden shears, cut your flowers at a slight slant to the desired length.  Be sure to remove any extra leaves that would be sitting in the water.  {These leaves tend to sop up water and breed bacteria, harming your precious blooms.} The blooms that rest on the outside of the arrangement should be slightly shorter than the ones that stand in the middle - arrange the outside blooms first and work your way in.  
  4. Voila!  You have a beautiful arrangement ready to proudly display. 
    • Lastly - Be sure to check your water levels daily, freshly cut blooms will drink up quickly.

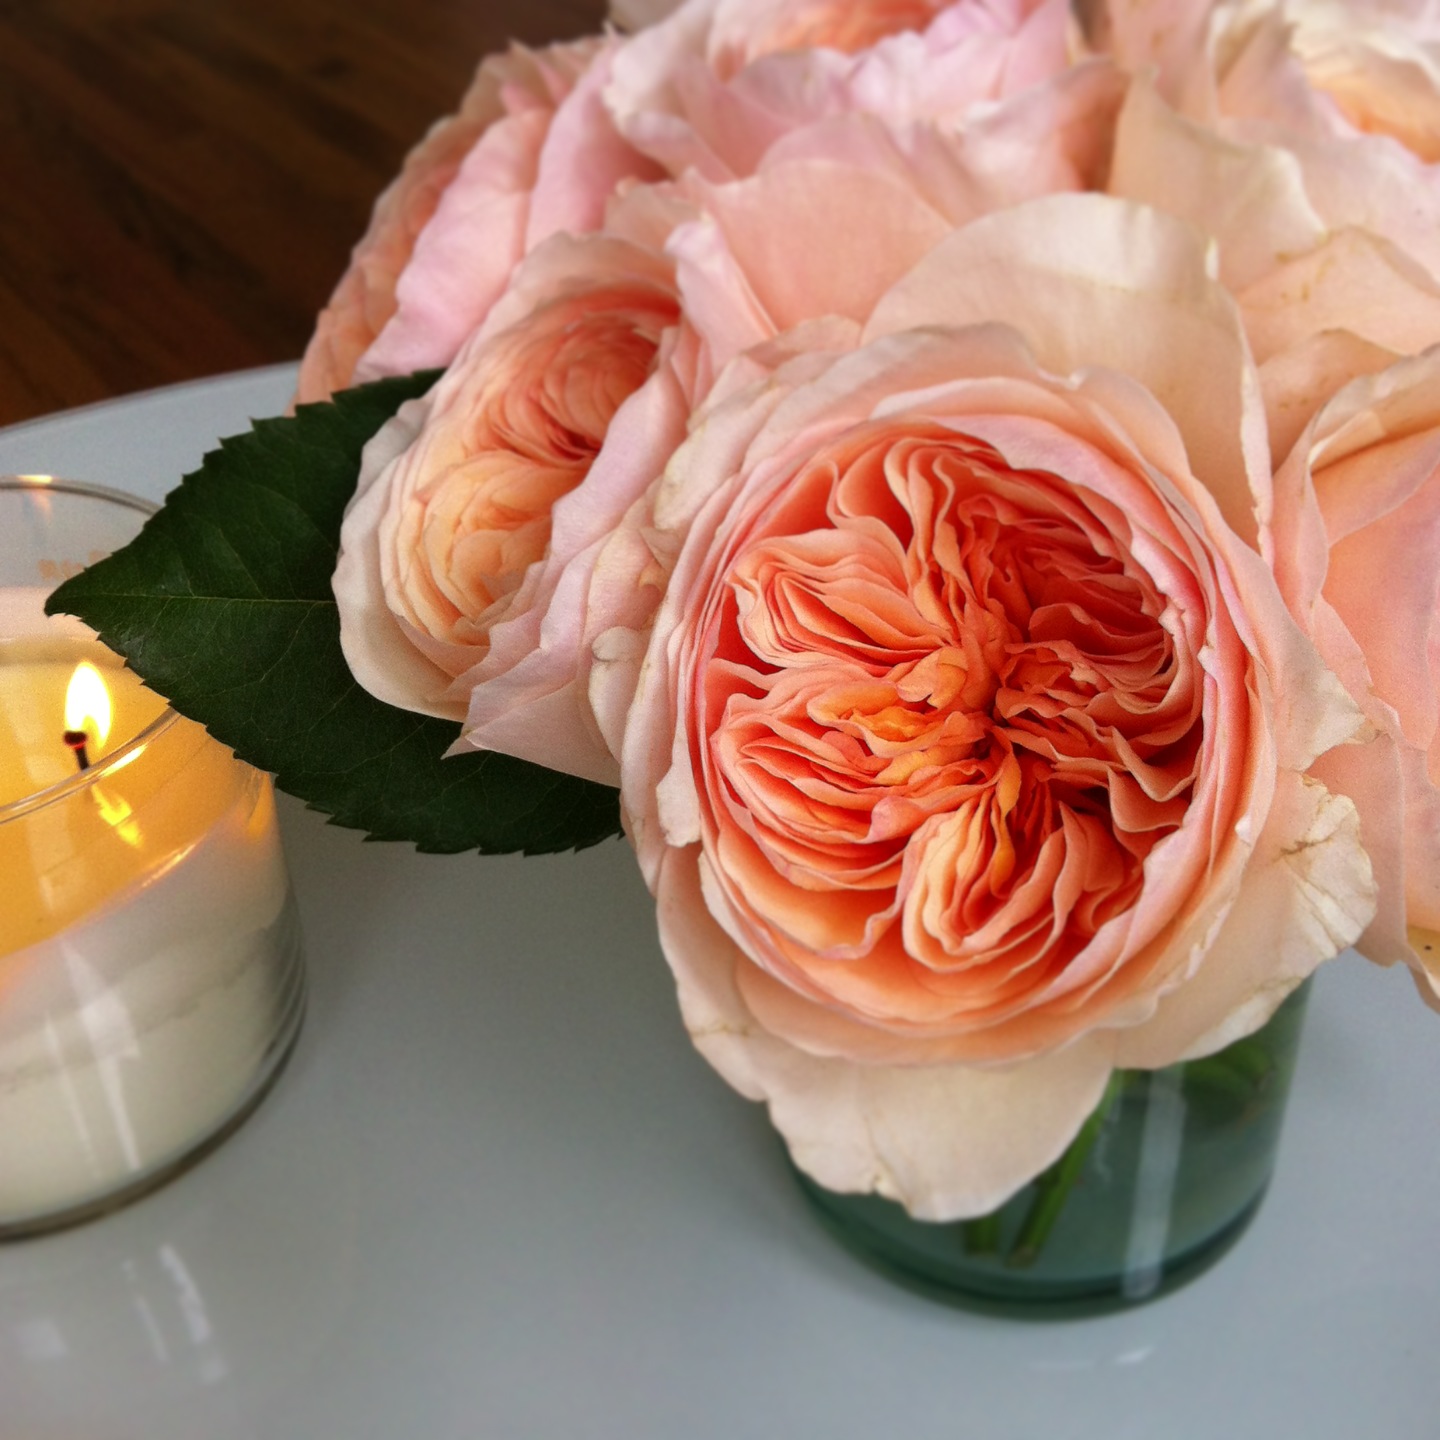
Here are a few of my recent floral arrangements...

{Garden Roses}

{Garden Roses}

{Peonies}

{Hydrangeas}

{....and of course, more Peonies}

I would love to know!  What are your favorite fresh cuts to have arranged in your home??  
Let me know in the comments below.

XOXO


- images via Danya Collyer

Tuesday, August 28, 2012

Home : DIY Terrariums


So you know those cute little succulent terrariums we're seeing all over Pinterest these days?  Well, I couldn't resist making one {or three} for myself.  Who doesn't love a pretty little plant pristinely layered in a pretty little jar?

This was such an easy and quick project, but I learned a few things along the way and thought I'd share...


You'll need :
- A jar {mason jars are adorable, or fancy jars/vases work, fish bowls are cute too!  I recycled a few salsa jars and found a fun fancy one at Marshalls.}
- Pebbles {found at a home improvement store or a pet store if you want different colors}
- Soil {make sure it's suitable for succulents}
- Activated Charcoal {found in pet stores, in the fish department - activated carbon is the same thing}
- Spagnum Moss {optional, also found at a home improvement store}
- An Assortment of Succulents {cuttings will work too, if you already have succulents around your yard. Cut them, trim the leaves around the base of the cutting and lay out to dry for 2-3 days.}
     - Rooting Hormone {home improvement store - but only needed if using succulent cuttings}


{ignore the bobby pins, those were for another project}
Assemble :
  1. Clean your jar and make sure no soaps or chemicals remain.
  2. Layer in this order :
    1. Pebbles
    2. Activated Charcoal
    3. Soil
  3. Now you're ready to arrange your darling succulents - if using a cutting, dip the tip in water and then coat in rooting hormone before planting.
  4. Top with moss.
You have a terrarium!  Easy right?


{layer}

{dip}

{arrange}

{voila!}


I will say this little project can get expensive if you don't have many of these things on hand.  I suggest going halvsies with a friend and doing it together - you'll most likely have plenty of supplies to make several terrariums.  Plus projects are better with girlfriends anyway, right?

Link up if you have made terrariums in the past...would love to see!

I'll be happy to answer any questions you may have as well {if I can}. :)

Happy planting!!

Wednesday, July 25, 2012

Food : 10 Minute Baked Potato

So a few days ago I had a hankering for a baked potato.  I remembered that beautiful sweet potato I bought over the weekend and thought I'd make myself a sweet savory treat for lunch.  In about 10 minutes I had a glorious Maple Glazed Sweet Potato sitting on my plate!  


How did I do that?  Let me show you....

My mom shared this handy trick with me a few years ago and I haven't baked a "traditional" baked tater since!  


  1. Grab a potato. {I use russet or sweet potatoes for this method.  "Baking" time may vary according to the size of your potato.  We'll get there in a minute.}
  2. Wash it well.
  3. Poke {carefully} a few times with a knife or fork.
  4. Pop it in the microwave on high for 5 minutes.  {I do 6 or 7 minutes for a large potato...the one below was considered large.}
  5. Carefully {its hot!} and snugly wrap it in foil and let sit for another 5 minutes {again, I let it sit another minute or two if it's large}
  6. Unwrap & voila!  You have a baked potato in about 10 minutes!  :) 

For a regular russet potato, I like to drizzle olive oil and a dash of salt over the skin before I wrap it in foil.

Maple Glazed Sweet Potato


  1. Bake a large sweet potato.
  2. Slice into 1/2 in slices and stack.
  3. Sprinkle with cinnamon, nutmeg and a dash of salt.
  4. Drizzle warm maple syrup over top.


Happy "baking"!  


- images via danya collyer

Thursday, June 28, 2012

Food : How To Fill & Frost A Cake


Last summer my mom and her sisters thought it would be fun to take a cake decorating class with their daughters.  So us girls pulled out our aprons, purchased our cake decorating kits and committed several week nights to honing our skills.

I'm by no means a pro, but I certainly learned a thing or two {or ten!} and I was reminded last weekend that practice makes perfect {hubby's birthday cake}.  While I was decorating, I thought it would be fun to do a post on filling and frosting a cake.  That was one of the most valuable things I learned last summer.   So here goes....  {Feel free to comment with questions if you have any. I'll do my best to answer.}

Baking
For hubby's bday cake I made a 6 inch gluten free chocolate cake and filled it with a raspberry filling and topped it with a homemade cream cheese frosting.  {you're salivating right?! I thought so. :)}  

The 6 inch cake pan is my absolute favorite!  Not only is it adorable and totally perfect for gifting a friend, but it's an easy and not so intimidating size to work with while learning to fill.  A 6 inch pan is a bit difficult to find in stores, so I ordered mine from amazon. {here}  When baking with a 6 inch pan, bake it at 325 degrees for 1 hour and 25 minutes.  {Be sure that your oven is at a legitimate 325 before inserting the cake and as tempting as it is to open the oven - don't touch that door! Let it completely bake for the required baking time.  This ensures you have a nice, fluffy cake every time.}

Use whatever size cake pan you'd like, I recommend something round for your first go at it.  Make your cake according to your recipe {I used a Duncan Hines Gfree Devils Cake box mix since I haven't found a great gluten free cake flour blend yet, and I doctored it up with a handful of semi sweet chocolate chips.}, thoroughly grease and flour your pan. {I use crisco - I know, gross.  But it's the best for guaranteeing your cake will completely come out of the pan.  I "flour" my pan with a thick layer of cocoa powder when baking a chocolate cake. I've used arrowroot powder or rice flour for a white cake.}  When baking time is up, remove from oven, transfer to a wire cooling rack and let cool completely.  I've learned the hard way to plan ahead.  There's nothing worse than spending lots of time and energy {and love} on a cake and then being rushed to decorate it and it's either a melty mess, lop sided, or sloppy.  I try to bake my cake the day before I need it.  

Filling
For my filling I used half a jar of store bought raspberry preserves with seeds {they look so pretty and fruity}.  You can use jam, preserves or even frosting - fruit preserves are usually my filling of choice.  

To make your filling use your preserve of choice + 1 tablespoon of butter.  Melt in a sauce pan over low heat, stir constantly.  Once it's a nice consistency, remove from heat and set aside.


Frosting
Make your frosting.  My absolute favorite frosting is a classic cream cheese frosting.  Crisco based frosting is disgusting {in my opinion} but is amazing for decorating with, so I will occasionally make a batch of this for details such as flowers, but I usually douse my cakes in a nice, thick layer of cream cheese frosting.  Here's my go to recipe:

1 8 oz Package Cream Cheese, Room Temp
1/2 C Salted Sweet Cream Butter, Softened
2 C Powdered Sugar 
1 t Vanilla {be sure to use clear vanilla if you want a pure white cake}

Combine in a mixer and mix until smooth.  

With a spatula, fill a piping bag with your frosting and set aside till ready to use.  

I have a featherweight cake decorating bag and decorating tips that I use for frosting.  If you don't have those, a large plastic ziploc will do the job.  Fill the bag, snip a corner tip off {not too much} and twist the top of the bag.


Cutting
If you only baked one cake and wish to cut into two halves so that you can fill it, you must cut the cake evenly.  This can be tricky.  Once again your cake must be completely cooled.  I have this nifty little cake slicer that gives me an even cut every time {and can be used to shave off the top of my cake if it's rounded}.  A large, sharp knife may be used as well, it's just a little more difficult to get an even slice.  

Cut your cake into two {unless you baked two cakes - if that's the case, even the tops and make them flat}.  Use your most even side for the top of the cake {if you can't get an even cut, turn the cake upside down and use the bottom side, this will be your top piece}.   

Assemble
Ok now we're ready to fill & frost!


The trick to getting your filling to stay in the center of your cake and not ooze all over the sides or into your frosting is to create a barrier with your frosting first.  {I forgot this step as you can see in this pic.  I was so excited to get that filling on that I completely skipped this step.  Thank goodness I remembered and had plenty of room on the sides to correct my mistake.  


Move the bottom half of your cake to the cake stand or plate you wish to serve it on.  {You can see in a pic below that my cake stand is sitting on top of another white rotating cake stand.  This is similar to a lazy suzan (which would work perfectly if you have one lying around), and is used to turn your cake easily while decorating.  Or you may purchase one here.}  

With your bag of frosting, frost the edge of the cake with at least two layers of frosting.  {This is still a necessary step if you're filling your cake with frosting.}


Next, spoon desired amount of filling onto center and spread with a spatula.


Now carefully place your top half of cake on top.


With your piping bag, pipe frosting onto the top and sides of the cake and smooth with a flat spatula.  Let sit before decorating.  The frosting will "dry" {or somewhat harden} if you allow it to sit and will be much easier to decorate.  

A handy little tip for achieving a flat surface is let your cake "dry" and then with parchment or wax paper, lay on top and gently smooth with a light rolling pin or flat spatula.  If your frosting cracks, gently smooth it out and let it dry again.  


Viola!  You have a beautifully filled and frosted cake ready for decorating!  Mine's not perfect, but like I said practice makes perfect.  


I hope this was helpful to you!  Happy frosting!!


- all images via danya collyer. 
Please do not use without permission.

Thursday, November 3, 2011

Lovely November & How To Cook An Acorn Squash

Friends, it's November - NOVEMBER!  How in the world did that happen so fast?  November is my favorite month of the year & for many reasons - it's truly fall and by now we Floridians usually have beautiful weather, it's the month that marks our wedding anniversary and my thoughts are filled with those sweet wedding memories, it's the month of Thanksgiving (my absolute favorite holiday), and it's time to indulge in all of those wonderful pumpkin and cinnamon spiced goodies.

November also marks the beginning of hectic schedules and I've already gone MIA on PPS.  With the holidays around the corner, there are so many fun things to blog about.  I really hope to make little PPS updates a priority here and there.

Today I'm busy packing for a little road trip to the Atlanta, GA area to lead worship for a weekend girl's conference.  I just love meeting new faces and spending time with sweet high school girls.  I'm really looking forward to it - pics to come next week.

You know I couldn't leave without posting a fun fall recipe though, right??  I don't know about you, but I love to buy random produce at the grocery store (usually what's in season) and figure out how to cook with it or add it to a dish.  This week it was a pretty little golden acorn squash.  To some of you, this may be a familiar fall vegetable, but for me it was totally foreign.  It had been sitting in my fruit bowl for a few days and while trying to come up with a quick and easy gfree dinner earlier this week, I couldn't ignore it's golden glow any longer - it was destined to be baked.  On the plate?  Pork Tenderloin, Baked Acorn Squash and Maple Glazed Asparagus....yummy, right?  So here's what I did.

Baked Acorn Squash
Ingredients
1 Acorn Squash
1 T Cinnamon
1 t Nutmeg
1/2 t Brown Sugar
1 T Maple Syrup
Salt (just a pinch)

Directions
1. Preheat oven to 150 degrees and rinse and dry your squash.
2. Cut into halves & seed.  
3. Lay flesh down on a glass tray or plate and microwave for 5 min.
4. Remove carefully from the microwave (plate will be hot) and turn over, flesh side up.  
5. With a knife or spoon, carefully rub flesh with butter till the surface has been covered.
6. Sprinkle about a tablespoon of cinnamon, 1 teaspoon nutmeg, 1/2 tablespoon of brown sugar & a pinch of salt over buttered squash.
7. Transfer squash, flesh side up, to a baking dish and drizzle a tablespoon of maple syrup over spices.
8. Bake in oven for 30 minutes or until a fork can easily poke through outer skin.
9. Cut into cubes and spoon out squash.  Enjoy!


Isn't she pretty??


(I know, my halves aren't so even...it's hard to get it just right.)


Beautiful!  

(As for the asparagus - I tossed it in olive oil, drizzled maple syrup and coated the heads with brown sugar and a pinch of salt.  Baked it for 30 min with the squash.  It's salty, sweet and crunchy!)

Have you made acorn squash before?  If so, how do you make it?


Related Posts Plugin for WordPress, Blogger...
©Pink Peony Style - Designed by BDD