Showing posts with label recipes. Show all posts

Thursday, September 27, 2012

Food : Pumpkin Chocolate Chip Cookies

Pumpkin, pumpkin and more pumpkin!  I just love the stuff!  

I wait all year for fall to arrive so I can break out my Pumpkin Chocolate Chip Cookie {PCCC} recipe.  Pumpkin + Chocolate?!  It's divine.  


I wish I could tell you where I got this recipe, but sadly I cannot.  I've revised it a bit, but if it looks familiar and you know who deserves the credit, please let me know.  Until then, mystery PCCC recipe creator, you are genius!  I thank you from the bottom of my fluffy, fall-baking-enlarged behind.  

I have to say, it's been tricky converting this to my gfree satisfaction.  If you're a gluten consumer, I've included notes on how much flour to use.  If you're gfree as I am, use the measurements I provided - any more flour and they will be too dry. {Trust me on this one.}

Prepare to fall in love...and you're welcome to your personal trainer or gym buddy for encouraging the need for extra workouts.  ;)


Pumpkin Chocolate Chip Cookies


- 1 1/2 C Canned Pumpkin {use more and you get a more gooey, cake-like cookie, less and a more firm cookie}
- 3/4 C Sugar
- 1/2 C Oil
- 1 Egg
- 1 tsp Vanilla
- 1 1/2 C Gluten Free Flour Blend { I use 1/4 C Arrowroot Powder, 1/4 C Coconut Flour, 1 C Rice Flour.  If you like a firmer cookie, add an extra 1/4 C Coconut Flour.  I prefer the cake-like texture, but hubby likes the more cookie-like texture, so my flour ratio depends on who I'm making them for.}  For my gluten eating friends, use 2 C Regular Baking Flour
- 2 tsp Baking Powder
- 1 tsp Cinnamon
- 1/2 tsp Nutmeg
- 1/4 tsp Allspice
- 1/2 tsp Salt
- 1 tsp Baking Soda
- 1 tsp Milk
- 1 C Chocolate Chips  {I always add extra}
- Nuts {optional - I usually do without, but if you're a nut lover - go for it!}
  1. Preheat oven to 375 degrees.
  2. Dissolve baking soda in milk & set aside. 
  3. In a large bowl combine pumpkin, sugar, oil, and egg. Stir. 
  4. Add flour, baking powder, cinnamon, nutmeg, allspice, salt, vanilla and baking soda mixture. Mix well. 
  5. Stir in chocolate chips and then spoon onto parchment lined cookie sheet. 
  6. Bake at 375 degrees 10 to 12 minutes.  Let cool & enjoy! 
Happy Fall!!

XO

Wednesday, June 20, 2012

Food : Super Greens

Hello, it's Melanie again from The Grecian Garden.  A typical scene played out in front of my refrigerator a few weeks ago, and I thought I'd share...

I got home late from work and hadn't planned out my dinner yet.  I had some left over salmon, but what to serve with it??  As I scanned the fridge a few times, I kept finding random greens and herbs.  Before I knew it, onions were being tossed in a hot skillet for a Super Greens sauté.

What's so super about the greens in this stir fry?

Arugula is actually a cruciferous vegetable and is in the same family as broccoli.  It is often called "rocket" and is an antioxidant and mineral power house.  Argugula's phytonutrient content may help prevent against certain cancers(1).

Watercress has been found in scientific studies to reduce DNS damage caused by free radicals(2). Jay Kordich says to juice watercress to help keep the lungs strong.  Watercress, also in the cruciferous family has a vitamin and mineral content that would put to shame any multivitamin on the grocery store shelves.  

Beet Greens, similar to most other greens, contain vitamins and minerals for strong, healthy bones.  Beet greens also have the amino acid tryptophan, which can be used by the body to create the neurotransmitter seratonin, which helps to regulate mood and sleep cycles.  Balanced mood and better sleep?  Bring on the beet greens!!


Beet Green Sauté

This side-dish comes together quickly and will round out any meal.  Don't like a strong "green" taste?  Don't skip the lemon juice.  It will make those greens addicting to the pickiest of eaters.

- 6 oz Fresh Arugula or Spinach {or combine the two}
- 1 Bunch Watercress
- 1 Bunch Beet Green {I used the beet green from three beets}
- 1/2 of a Large Onion
- 3 Garlic Cloves
- 1/2 in Piece of Ginger Root {optional}
- Salt & Pepper, to taste
- 2 t Fresh Dill, chopped
- 1/2 a Lemon
- Sesame Oil {unrefined}, for cooking
- Sesame Oil {toasted}, for drizzling
  1. While your 10" skillet is preheating to a medium heat, chop your onion, slice your garlic and grate your ginger.  Add 2 T unrefined sesame oil to skillet and toss in the onions garlic and ginger.  Stir often to prevent burning.
  2. Chop watercress and beet greens.  Toss into hot skillet with arugula or spinach and season with salt and pepper.
  3. Stir until greens are tender, about 3 minutes.
  4. Remove from heat and stir in fresh dill and sprinkle with lemon juice.
  5. Drizzle with toasted sesame oil just before serving.
I hope you enjoyed this recipe!  Check back for more healthy and inspiring recipes soon.

-Melanie


* 1 | 2
-image via Melanie

Wednesday, June 6, 2012

Food : Parsnip Fries


Hi friends, Melanie from The Grecian Garden, bringing you a fresh new recipe.

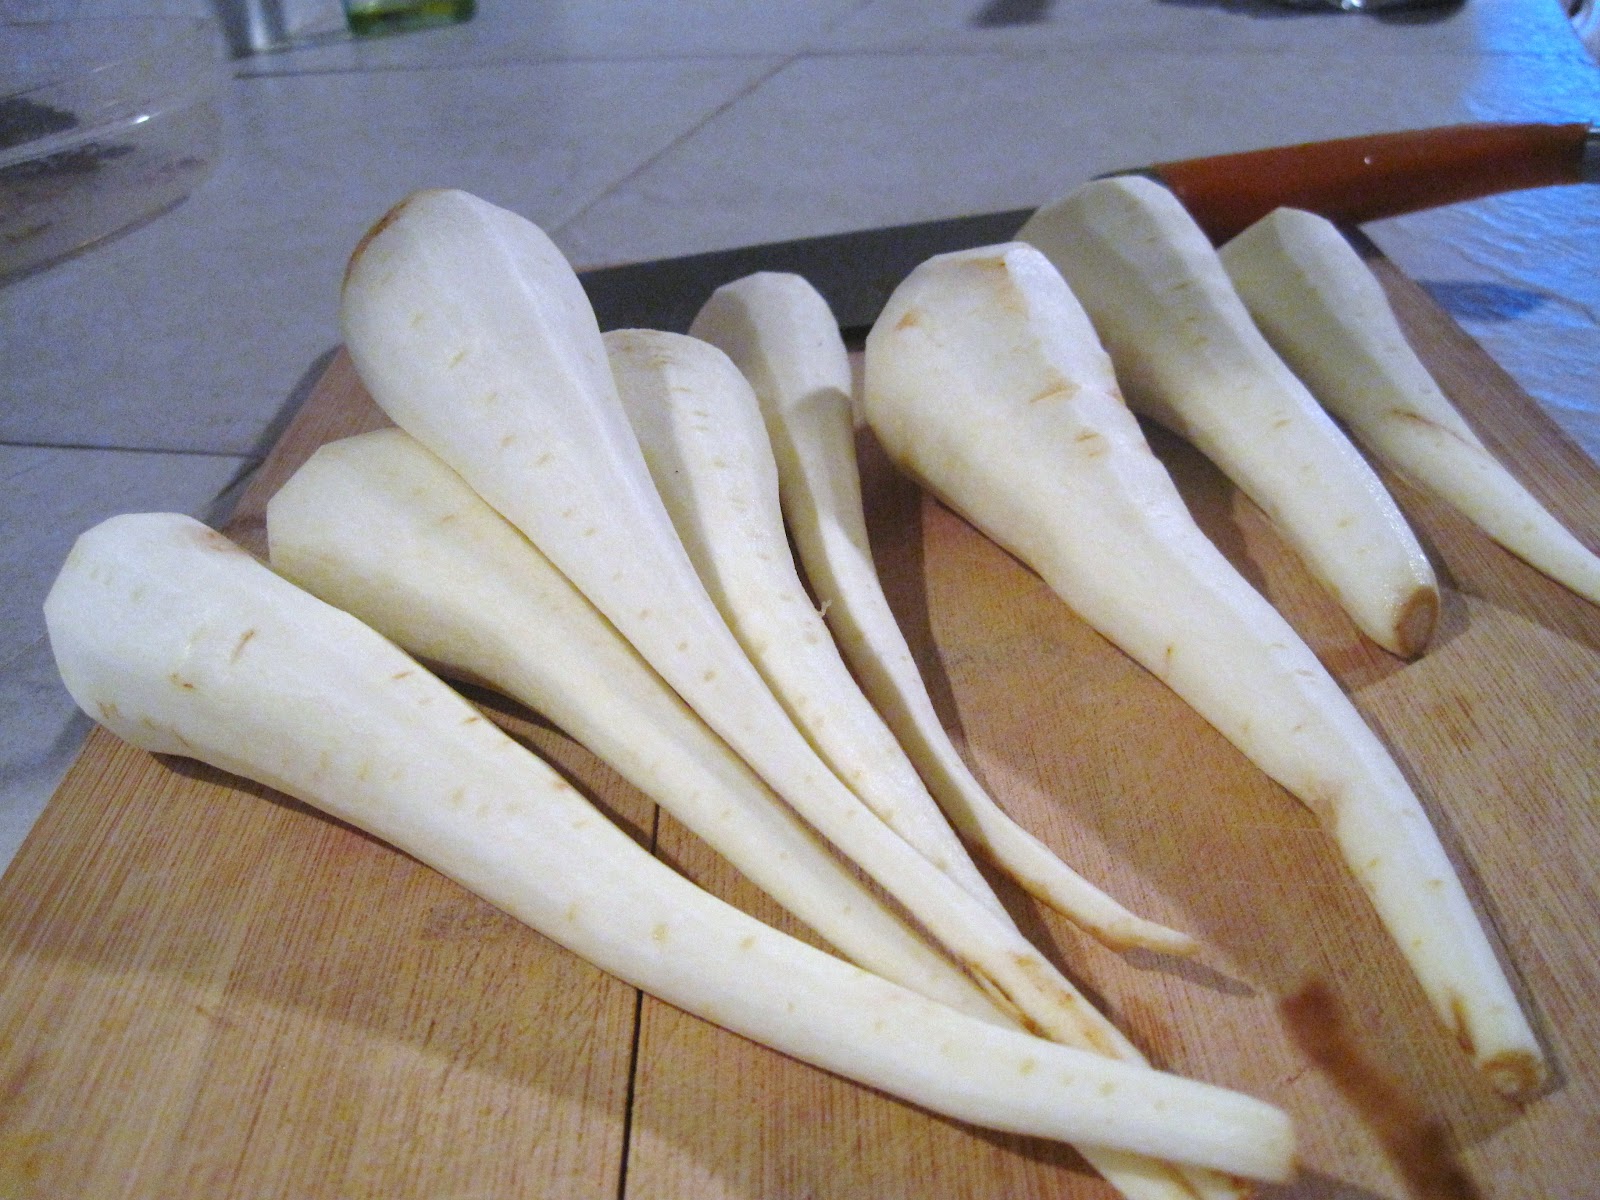
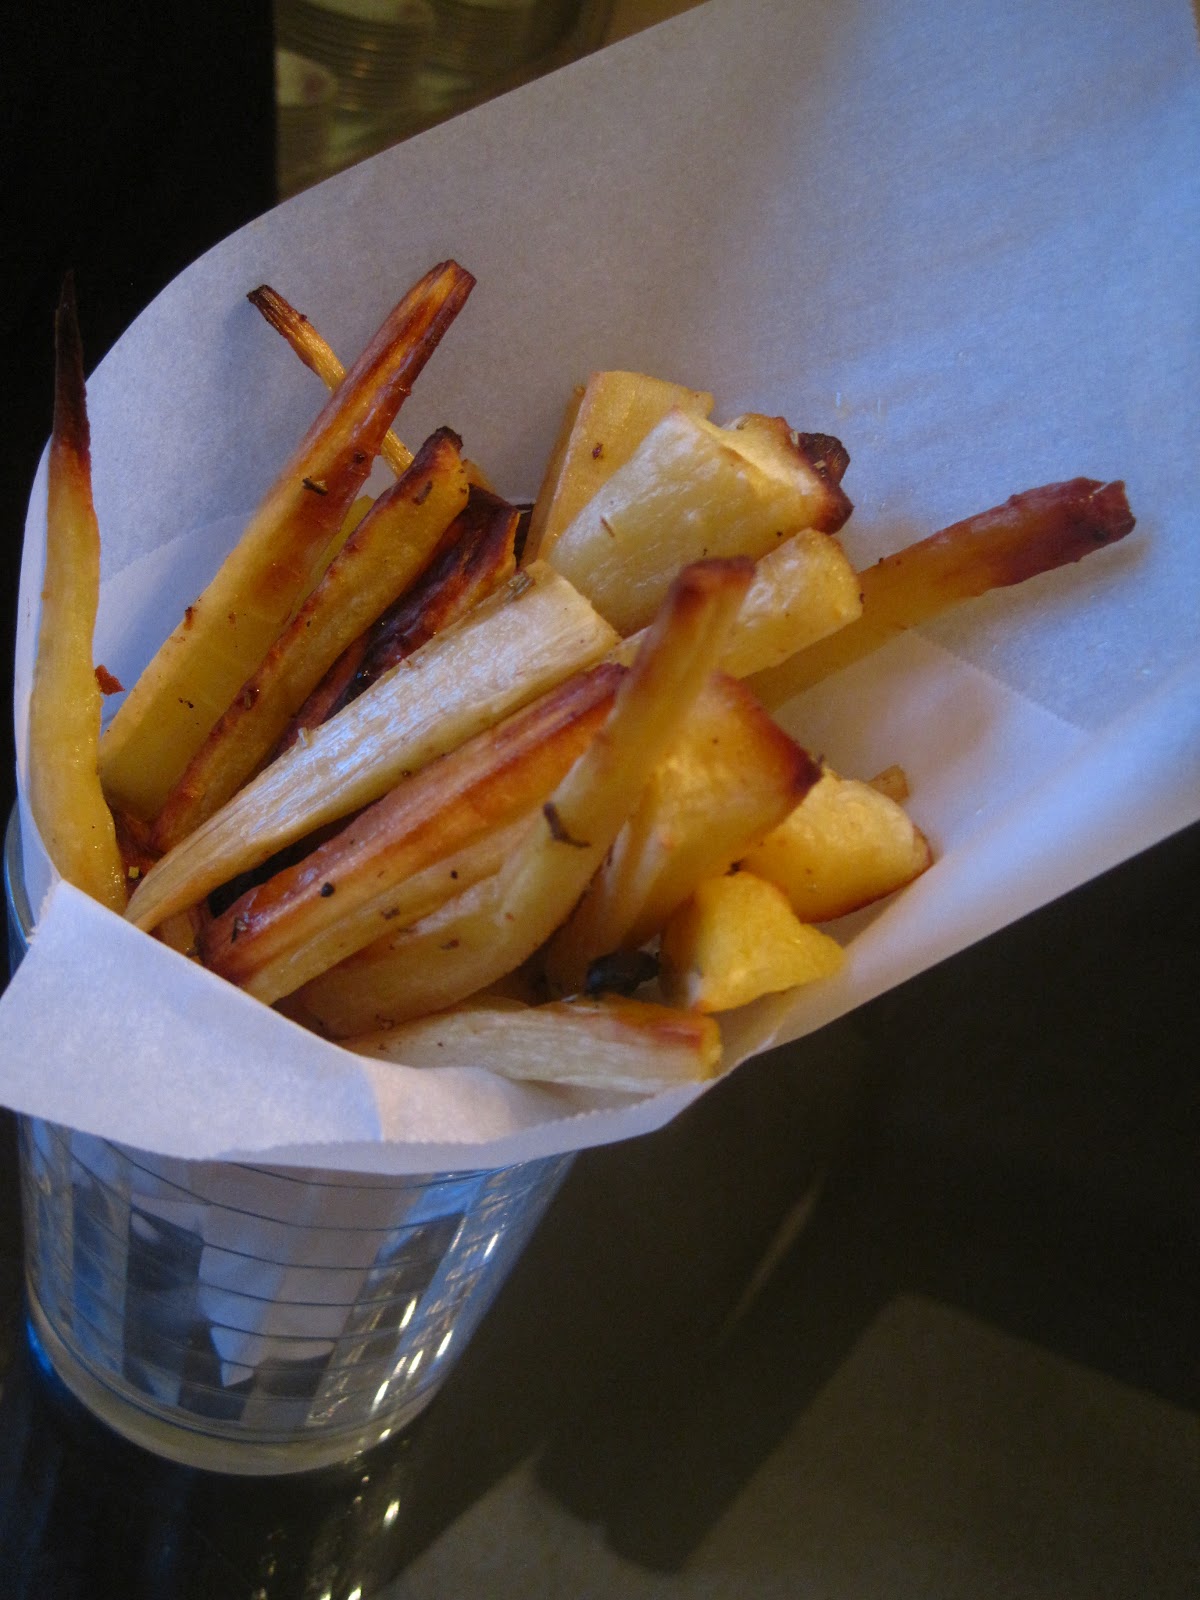
On busy weeknights I, like you, need side dishes that are quick to prepare and won't chain me to the oven for a stir-a-thon.  Enter parsnip fries on the scene.  After peeling and a quick chop, I toss them in the oven, giving me 20 minutes to create the rest of my dinner.  


I'm constantly on the look out for a substitute for white potatoes.  I grew up eating the creamiest, mashed potatoes, this side of the Mississippi, on a weekly basis.  But it wasn't the creamy spuds that stole my heart.  It was the baked Greek fries that I couldn't get enough of.  Long gone are the days of stuffing myself with white potatoes, as they always seem to throw my tummy for a tizzy.  These days, I choose my carbs wisely - carbs that make me feel good.


Parsnips have a slight licorice flavor and paired with herbs such as rosemary or marjoram, they really come to life.  I hope you enjoy this quick weeknight side as much as we do.


Parsnip Fries

The thinner you make these, the crispier they will be.  I make mine more like steak fries to get the crispy exterior and the creamy interior.

- 1 lb of Parsnips
- 3 T Oil, plus extra for greasing {I prefer coconut, but olive oil will do.}
- 1 t Salt
- Pepper, to taste
- 1 T Freshly chopped Rosemary or Marjoram {or 1 tsp dried}
- Half a Lemon
  1. Preheat oven to 425 degrees.  Line a cookie sheet with parchment paper and lightly coat with oil of choice.
  2. Wash, peel and trim parsnips.  Cut into sticks as thick or think as you like.  Place onto cookie shed, coat with oil and sprinkle with salt, pepper, and rosemary.
  3. Roast for 20 minutes, turning half way through cooking.
  4. Sprinkle with half lemon just before serving.

I hope you enjoyed this recipe.  Be sure to check back soon for another yummy recipe!

- Melanie

- images via Melanie

Wednesday, May 30, 2012

Food : Quinoa Stuffed Zucchini Blossoms

Hi!

Melanie here.  I am so excited to join such a wonderful team, here at Pink Peony Style, created by my great friend Danya.  Danya and I share a love of good food that just so happens to be gluten free.  I enjoy making food that tastes so good, you or your family will never guess that it's gluten free {and healthy!}.  My favorite things to create in the kitchen are classic Greek dishes with my now healthy, g-free twist.  I'm thrilled to share my best recipes with you and I look forward to connecting with you here, on my blog, Facebook or twitter.  

Okay, enough about me.  Here's a recipe so intriguing, it really doesn't need an introduction. {Although it does involve eating flowers.}

Have you ever eaten flowers?  No, I'm not talking about those edible ones you buy at the grocery store in plastic containers.  I'm talking, strolling through your backyard {or your neighbors!} and being drawn in by such beauty that you had to take a nibble.  I can remember picking little yellow flowers in our backyard as a child and one day, the thought came to mind to taste the tiny yellow beauties.  I had never tasted something so bright and lemony!  We often think of flowers as being great additions to face and body potions, so why not share the love with our taste buds?  


Kolokythanthoi Yemistoi, or stuffed squash blossoms as they are called in Greece, is a traditional Greek appetizer usually stuffed with a combination of ground meat, herbs, and minced vegetables.  Both my husband and my father remember their Greek mothers gathering and stuffing squash blossoms from their gardens and filling them with a hearty meat filling.  

Last week, when I picked my squash blossoms, I didn't have any ground meat to make the traditional filling.  However, I did have some leftover quinoa in the fridge, so my recipe making wheels started to spin!  I soaked my zucchini blossoms and began to create the filling {which came together rather quickly since the quinoa was already cooked.}


Once I had my filling made, I began to stuff the blossoms. Since I had soaked them in water already, they were quite tender and easy to fill.  I simply laid them out, and one flower at a time, I gently lifted a petal and snipped the pistil or stamen from the inside.  Then I stuffed the bases with a small amount of filling and set them in a glass dish until I had finished stuffing the others.


Now that they were stuffed, they were ready to cook.  In less than 10 minutes I had the most delicate, savory appetizer.  I seared them for a few minutes in coconut oil on each side, for a total of 9 minutes.  {You could stuff them and keep them in the fridge until your guests arrive as they cook up fast.}  The flowers become tender, the filling becomes warm and each bite welcomes you into Greek appetizer heaven.  {Adding feta cheese to them is completely necessary if you can tolerate dairy.}


Quiona Stuffed Zucchini Blossoms

No squash blossoms?  No problem.  Simply use this filling to stuff mushrooms, artichoke buttons, or place of scoop of filling onto broiled eggplant.  Don't plan on there being any leftovers - these cute little blossoms are addicting {and not just to women...my husband ate his faster than I ate mine}.

Ingredients
- 18 Squash Blossoms {or whatever you plan to stuff}
- 1/2 Onion, chopped
- 1 Carrot, peeled & chopped
- 1 Stalk of Celery, chopped
- 3 Mini Sweet Red Peppers {or 1/2 of a large red bell pepper, chopped}
- 1 Cup Spinach, Arugula or other quick cooking green {optional}
- 3 Cloves of Garlic, minced
- 1/2 C Quinoa, cooked
- 2 T Fresh Dill, chopped
- 1/4 C Cranberries, finely chopped
- Salt & Pepper {to taste}
- 1/2 Lemon
- Coconut Oil
  1. Combine onion, carrot, celery, red peppers, spinach, garlic, quinoa, dill, cranberries, salt, pepper and lemon juice into a bowl.  Mix until blended.
  2. Lay one squash blossom flat on a napkin and while gently opening one petal while stuff 1/2-2 teaspoons of filling into each blossom.  Be careful not to over-stuff.  Twist top of flower blossom and lay in a dish until all blousoms are filled.
  3. Heat a 10 in skillet to medium heat and add 1 T coconut oil.  Reuce heat slightly and add stuffed squash blossoms 8-9 at a time.  
  4. Cook blossoms a few minutes on each side, turning every few minutes to cook all sides evenly.  {Mine were in the skillet for a total of 9 minutes.}  
  5. Once cooked through, place on a plate and sprinkle lightly with salt. Enjoy! 

I hope you enjoyed this recipe.  I would love to hear about your experience with making your own Quinoa Stuffed Squash Blossoms.  {Have you ever incorporated flowers into a dish?  If so, what?}

Stay tuned for more recipes and don't forget to enter the PPS giveaway.

- Melanie


This post linked with Friday Foodie Fix.

Thursday, March 15, 2012

Portobello Eggs Benedict

Prior to my gluten free lifestyle, hands down, Eggs Benedict was my all time favorite breakfast indulgence.  Breakfast {or brunch} is my favorite meal to eat out, so every breakfast date usually included a cup of coffee and a glorious plate of english muffin, eggs, bacon and hollandaise goodness.  My food life received quite a blow the day I discovered I had to be gfree.  Breakfast dates we no longer fun, eating out was difficult with friends (watching them order whatever gluten filled dishes their heart so desired, and me salivating over their meal between bites of my salad), and cooking at home was a challenge.  Suffer no more!  I decided I was no longer going to miss out on my favorite foods, and I was going to make versions that not only I could eat, but that I desired to eat.

A while back, a friend of mine forwarded a delicious looking recipe of Portobello Eggs Benny, but doubtful it would ever taste as good as that english muffin, I never made it.  However, a few weeks ago, with my sister's arrival, I wanted to make a fun and unexpectedly yummy gfree breakfast.  Inspired by my friend's Portobello Benny, I put my kitchen skills to the test and boy did they deliver!  My gluten eating husband and sister gobbled up these mini sized Eggs Benedict and raved about them for days after.


Easy, inexpensive & impressive - Portobello Eggs Benedict is the perfect weekend brunch dish to serve to friends and family {or just you ;)}.  I hope you enjoy this recipe as much as I do.

Gluten Free Portobello Eggs Benedict

You'll Need : 
  • 6 Eggs
  • 6 Small Portobello Mushrooms {washed and stemmed}
  • 6 Pieces of Canadian Bacon
  • 1 T Olive Oil
  • 1 t Vinegar
Hollandaise Sauce
  • 3 Egg Yolks {room temp}
  • 1/2 C Butter {cleanly melted}
  • 1/2 Lemon {juiced}
  • 1/4 t Salt
  • 2-3 T warm water {use as needed}
  • Cayenne Pepper {optional}

Eggs, Mushrooms & Bacon
  1. Preheat oven to 200 degrees F and have a cookie sheet or shallow baking dish available. 
  2. Fill half a sauce pan with water and add 1 t vinegar.  Bring to a boil.  
  3. One by one, gently crack eggs and lower into boiling water.  Let boil for 4 minutes. {NO LONGER}
  4. With a slotted spoon, remove from water and transfer to a paper towel lined plate.
  5. In a frying pan, add 1 T Olive Oil and set on medium/high heat.  Add mushroom to pan cap-side up, let cook for 1-2 minutes.  Flip mushrooms and cook till both sides are beautifully browned.  Transfer mushrooms to cookie sheet and place in oven to keep warm.  
  6. Add Canadian Bacon to pan {keeping juices from mushrooms in pan - add a touch of oil if pan is dry} and cook on both sides till bacon is warmed through and sides are lightly browned.  Transfer to cookie sheet and keep warm in oven.
Sauce
  1. Combine egg yolks, lemon juice and salt in blender.  Blend on high till combined {just a few seconds}.
  2. Add butter and blend again {just a few seconds}.
  3. Slowly add warm water to temper the eggs, blend on high {a few more seconds}.  Add more or less water for desired consistency.  

When ready to serve...
  1. Lay one mushroom upside down on plate.  Layer with a piece of canadian bacon and a poached egg.
  2. Top with hollandaise sauce and a dash of cayenne pepper.
  3. Enjoy!


- all images via danya collyer


Thursday, November 3, 2011

Lovely November & How To Cook An Acorn Squash

Friends, it's November - NOVEMBER!  How in the world did that happen so fast?  November is my favorite month of the year & for many reasons - it's truly fall and by now we Floridians usually have beautiful weather, it's the month that marks our wedding anniversary and my thoughts are filled with those sweet wedding memories, it's the month of Thanksgiving (my absolute favorite holiday), and it's time to indulge in all of those wonderful pumpkin and cinnamon spiced goodies.

November also marks the beginning of hectic schedules and I've already gone MIA on PPS.  With the holidays around the corner, there are so many fun things to blog about.  I really hope to make little PPS updates a priority here and there.

Today I'm busy packing for a little road trip to the Atlanta, GA area to lead worship for a weekend girl's conference.  I just love meeting new faces and spending time with sweet high school girls.  I'm really looking forward to it - pics to come next week.

You know I couldn't leave without posting a fun fall recipe though, right??  I don't know about you, but I love to buy random produce at the grocery store (usually what's in season) and figure out how to cook with it or add it to a dish.  This week it was a pretty little golden acorn squash.  To some of you, this may be a familiar fall vegetable, but for me it was totally foreign.  It had been sitting in my fruit bowl for a few days and while trying to come up with a quick and easy gfree dinner earlier this week, I couldn't ignore it's golden glow any longer - it was destined to be baked.  On the plate?  Pork Tenderloin, Baked Acorn Squash and Maple Glazed Asparagus....yummy, right?  So here's what I did.

Baked Acorn Squash
Ingredients
1 Acorn Squash
1 T Cinnamon
1 t Nutmeg
1/2 t Brown Sugar
1 T Maple Syrup
Salt (just a pinch)

Directions
1. Preheat oven to 150 degrees and rinse and dry your squash.
2. Cut into halves & seed.  
3. Lay flesh down on a glass tray or plate and microwave for 5 min.
4. Remove carefully from the microwave (plate will be hot) and turn over, flesh side up.  
5. With a knife or spoon, carefully rub flesh with butter till the surface has been covered.
6. Sprinkle about a tablespoon of cinnamon, 1 teaspoon nutmeg, 1/2 tablespoon of brown sugar & a pinch of salt over buttered squash.
7. Transfer squash, flesh side up, to a baking dish and drizzle a tablespoon of maple syrup over spices.
8. Bake in oven for 30 minutes or until a fork can easily poke through outer skin.
9. Cut into cubes and spoon out squash.  Enjoy!


Isn't she pretty??


(I know, my halves aren't so even...it's hard to get it just right.)


Beautiful!  

(As for the asparagus - I tossed it in olive oil, drizzled maple syrup and coated the heads with brown sugar and a pinch of salt.  Baked it for 30 min with the squash.  It's salty, sweet and crunchy!)

Have you made acorn squash before?  If so, how do you make it?


Tuesday, October 4, 2011

GFree Sweet & Spicy Chili

I've been making the most of this cooler weather.  We're already diving into those yummy comfort foods. Last night we had one of my husband's favorites - Homemade Sweet & Spicy Chili.  I love chili for several reasons - it's warm and hearty, we usually have leftovers that last us several meals, it can be topped with all sorts of yummy toppings, and I can throw whatever's in the pantry in & it still tastes delicious!  It turns out differently every time I make it, but the base is always the same - lots of tomatoes, a hint of sweetness & a spicy kick that follows each bite.  Chili can easily be naturally gluten free, just watch those "chili seasoning packets" - growing up, my mom always made chili with those and I've come to find that they're certainly NOT gluten free.  Here's the recipe from last night....enjoy!


G-Free Sweet & Spicy Chili


Ingredients
1.5 lb Lean Ground Beef or Turkey
1 Small Sweet Onion, Chopped
2 Cloves Garlic, Chopped
1 Green Bell Pepper, Chopped
1 T Olive Oil
1 (15 oz) Can Diced Tomatoes, Undrained
1 (15 oz) Can Tomato Sauce
1 Cup Tomato Juice (do NOT use V8)
1 (15 oz) Can Sweet Corn, Drained
2 (15 oz) Cans Red Kidney Beans, Rinsed & Drained
1 (15 oz) Can Chili Beans, Undrained
2 T Brown Sugar (honey or agave could be used instead...just don't over do it)
2 T Chili Powder
2 T Parsley Flakes
1 T Ground Cumin
Salt, To Taste
Cayenne Pepper, To Taste

Toppings (optional)
Shredded Sharp Cheddar Cheese
Low Fat Sour Cream (or plain greek yogurt)
Cilantro
Chopped Green Onions
GFree Tortilla Chips


Directions

  1. Coat bottom of large stock pot with Olive Oil.  Add garlic, onion, pepper & a pinch of salt - cook on high, stirring until onions are clear.  Push to the side of pot and add ground meat.  Cook meat till completely browned (be sure there is NO pink left).
  2. Combine diced tomatoes, tomato sauce, tomato juice, corn, kidney beans, chili beans, brown sugar, chili powder, parsley flakes, cumin, salt & cayenne pepper and bring to a boil, stirring well.  
  3. Once brought to a boil, set to low, cover and let simmer for 45-60 minutes.  (This could also be done in the am & left in a crock pot on low for 8 hrs.  Just be sure to thoroughly cook meat beforehand.)
  4. Spoon into bowls, top with your favorite toppings & enjoy!
Aside from chopping a few things, clean up is rather simple - I love one pot meals!  And I can easily pop the lid on and toss left overs in the fridge.  It makes a great topping for g-free tortilla chips, and a wonderful lunch if poured over jasmine rice the following day, we've also done chili turkey dogs - so versatile!

So tell me, what's your favorite way to have chili?


Wednesday, September 21, 2011

GF Stuffed Mushrooms

I can't believe it's already Wednesday!  Oh how the days fly.  We celebrated my cousin's 30th birthday on Saturday and of course, I had to find a simple yet fabulous gf recipe to share.  For some reason stuffed mushrooms were on the brain, but I have yet to make them without bread crumbs.  By now, you know I love a challenge, so I decided to hunt for a good g-free stuffed mushroom recipe.  I found my inspiration here, but decided to make it my own.  They turned out delish if I may say so myself!  A winning party recipe for sure.  


G-Free Stuffed Mushrooms

Ingredients
24 Whole Fresh Mushrooms
2-3 T Butter, Melted
1 T Olive Oil
1 T Minced Garlic
1 (8oz) Package Cream Cheese, Softened
1/2 C Cooked Sausage Crumbles
1/2 C Shredded Parmesan Cheese (reserve a little for topping)
1/4 C Green Onion, Chopped (reserve a little for topping)
1/4 t Ground Black Pepper
1/4 t Onion Powder
1/4 t Ground Cayenne Pepper (use sparingly if you don't want to have a little kick)

Directions
  1. Preheat oven to 350 degrees F.  Melt butter and spoon a small amount into each cup of a mini muffin pan.  (A baking sheet will work, but a muffin pan holds the mushrooms perfectly, keeping all of their insides, well, inside.  If using a baking sheet, spray it with cooking spray and shave a small amount off the bottom of each mushroom, this will help to keep them stable.)  Clean mushrooms with a damp paper towel & carefully break off stems (setting stems aside in a small bowl to be chopped) & set mushroom cups upside down into the muffin pan.  Chop stems extremely fine, discarding any tough spots.
  2. Heat oil in a large skillet over medium heat.  Add garlic and chopped mushroom stems to the skillet.  Fry until mushrooms are browned.  Add cooked sausage crumbles (if not cooked, cook in a separate pan before adding to the mixture) & fry until most moisture has been absorbed.  Set aside to cool.
  3. In a small bowl, mix cream cheese, parmesan cheese, black pepper, onion powder & cayenne pepper.  Fold in chopped green onions (leaving a few behind to top your mushrooms). 
  4. Once cooled (can still be warm, just not hot), fold mushroom/sausage mixture into cream cheese mix. 
  5. Spoon mixture into a ziploc bag & trim tip off, pipe into mushrooms.  
  6. Top with remaining parmesan cheese and green onions & bake for 20 minutes, or until mushrooms are golden.
  7. Let cool & ENJOY!
*Mushrooms can be made a few days in advance and baked just before you need them.  


{Clean & remove Stems}

{Melt Butter & Spoon into Muffin Tin}


{Place Mushrooms into Pan}

{Sauté garlic & chopped mushroom stems & add cooked sausage}

{Make Cream Cheese Mixture}

{Pipe into Mushroom Caps}

{Top with Parmesan Cheese & Green Onions}

{Bake till golden brown}


{Enjoy!}


Saturday, August 13, 2011

Pin Happy

I recently discovered Pinterest - Oh. My. Goodness.  It's the ultimate inspiration - a place to "pin" your favorite photos of art, fashion, decor, diy projects, recipes, etc.  You can use it to keep all of your ideas in one place, while also being inspired by the "pins" & "boards" of other pinterest users.  I love it!  I could spend hours just flipping through all of the decor, fashion & party photos.

If you haven't already created an account, I highly recommend you head over to Pinterest and become part of the creative community (follow me if you like ;).  Whether it be a place to store photos for inspiration for a wedding, baby room, house renovation, party/shower, fashion inspiration or products you love - I guarantee you'll find yourself inspired.

Here are a few of my favorite photos thus far...happy pinning!


Related Posts Plugin for WordPress, Blogger...
©Pink Peony Style - Designed by BDD