Showing posts with label food. Show all posts

Monday, May 5, 2014

Orange Rosemary Chicken


Last week Monterey reached record highs for the month of April with weather reaching high 80's/low 90's.  I know that doesn't sound so hot, but goodness most of the homes and buildings in this area don't have air conditioning systems, our apartment being one of those homes.  It was toasty.

My sister was visiting, and we were originally planning on a soup dinner, but when warm weather hits you've gotta run with it.  Soup was put on hold and chicken was on the menu.  I knew I wanted to make something summery and citrusy, so Orange Rosemary Chicken was born.  I served it with roasted veggies, a summer strawberry and spinach salad and cold watermelon slices.  Yummy, right??  This was easy to whip up and can be left to marinate for several hours prior to baking (or grilling).

Orange Rosemary Chicken

- 1 lb. Chicken Legs
- 1 8oz. Bottle Orange Muscat Champagne Vineagar (from Trader Joes, but any orange or champagne vinegar will do)
- 4 Sprigs of fresh Rosemary, roughly chopped  (set some aside for topping)
- 1/2 Orange, sliced  (save other half to squeeze into marinade)
- 1/2 Lemon, sliced  (save other half to squeeze into marinade)
- 1 T Extra Virgin Olive Oil
- 1 T Honey
- Dash of Salt & Pepper

  1. Salt and pepper chicken, set aside.
  2. In a large ziploc bag, combine vinegar, oil, honey, and squeezed orange and lemon juice.  Add chicken and top with rosemary.  Let marinate at least 45 min in fridge. 
  3. Preheat oven to 375*.  Arrange chicken onto baking sheet evenly spaced (I like to line mine with foil for easy clean up), making sure none of the legs are touching (this ensures even baking).  Top with orange slices, lemon slices and remaining rosemary.
  4. Bake uncovered for 30 min, turn and bake another 20-30 min or until inside temp reaches 160*.
I can't wait to hear what you think! 
Here's to warm weather.


Monday, March 10, 2014

Banana Almond Bites


Clean eating 2014 is still going strong.  I've always been one to eat well, but when reaching for a quick little something to snack on, unless it's been prepared in advance, I usually grab something packaged (like popcorn or granola bars or dare I say it?  Chips! *gasp*).  Over the past few months I've been trying to make snacks from fresh foods - it's not always easy, because lets face it, us Americans want instant gratification when our tummies begin to growl or our energy plummets.  Let me introduce you to one of my easy, protein boosting goto's - Banana Almond Bites.

These remind me of my mom's peanut butter banana sandwiches when I was a kid.  On a good day I'd get a little surprising burst of sweet honey, oozing from the insides.  Good memories.  

I know this recipe is nothing mind blowing or totally original, but I thought I'd share for those looking for little ideas to add to their daily recipe box.

Banana Almond Bites

- 1 Ripe Banana
- Almond Butter (my favorite is Justin's)
- Clover Honey
  1. Slice bananas into 1/2 in pieces. 
  2. Spoon almond butter onto banana slice and top.
  3. Drizzle with honey.
Yummy! You could also sprinkle a little protein powder on top for an extra energy boost. And if you wanted to get really creative with it - you could spear them with toothpicks and dip them in melted dark baking chocolate and freeze for a sweet little treat. (I may have to do that and report back with the results.)

What are your fresh and easy goto snacks?  Would love to hear!

XO
d

Friday, October 4, 2013

Pumpkin Chocolate Chip Cookies


Can you believe we’re in the first week of October already?!  Where has the year gone?  I certainly won’t complain.  It’s been a great year thus far and I’m happy to welcome the fall season.  I’ve never lived in an area that experiences a full change of seasons, but I still get excited at the thought of holidays being just around the corner, gathering with friends and family over really great food, activities such as pumpkin carving and running through a corn maze, sipping on hot tea and warm apple cider, and pulling out all of those yummy spiced baking recipes.  Fall is just so warm, friendly and cozy - what’s not to like?

Over the years I’ve become known for my Pumpkin Chocolate Chip Cookies (PCCC).  Come fall, it’s almost expected that I bake a batch for any social gathering.  A few years ago, my bridesmaids even went out of their way to make a batch for my bridal shower (in October) because they knew I loved them so.  I know...pumpkin and chocolate?  That was my first thought too.  But trust me on this one, these are so scrumptious!  They’re a little less like a cookie and more like a bread, but in perfect little bite sized portions.  Seriously, so good.  

Turning my original recipe into a gluten free recipe was a bit tricky, but I’ve had 3 years to perfect it and think I’ve found a suitable flour to substitute for a fabulous gluten free PCCC.  That said, let the baking begin!  What better way to get into the fall spirit, than by baking with a little pumpkin?


Pumpkin Chocolate Chip Cookies

1 1/2 C Canned Pumpkin
1 C White Sugar
1/2 C Canola Oil
1 Egg
*2 C of "Cup4Cup Gluten Free Flour" (from Williams Sonoma)  
2 t Baking Powder
2 t Ground Cinnamon
1 t Pumpkin Pie Spice (I use Trader Joe’s - otherwise a dash of ground nutmeg, ground ginger, allspice and a little lemon zest works nicely too)
1/2 t Salt
1 t Baking Soda
1 t Milk
1 t Vanilla Extract
2 C Semisweet Chocolate

  1. Preheat oven to 350 degrees F (175 degrees C).  Dissolve the baking soda with the milk and set aside.
  2. In a mixer combine pumpkin, sugar, vanilla, canola oil and egg.  Mix until smooth.
  3. In a separate bowl, whisk together flour, baking powder, ground cinnamon, pumpkin pie spice and salt. Add baking soda mixture.
  4. Slowly add dry ingredients with wet until completely mixed. (Be careful not to over mix.  This is easy to do when using gluten free flours.)
  5. Fold in chocolate chips.
  6. On a parchment lined baking sheet, drop by spoonful and bake for 10 minutes or until lightly brown and firm.
  7. Let cool and enjoy!
*I also had great results with the Pamela’s Baking Flour.  These two flours gave me the best results.  I did try several different flour combinations (rice, tapioca, coconut, etc) but was sorely disappointed.  
**If using regular wheat flour, do 1 C Canned Pumpkin and 2 C Baking Flour.

I can't wait to hear what you think!  Happy Fall!


Tuesday, July 23, 2013

Chocolate Peanut Butter Oreo Mousse


In response to an instagram photo I posted over the weekend, I had many recipe requests for these decadent dessert cups.  We had some friends over for dessert last Saturday and while I was perusing Pinterest for dessert-spiration, I found a recipe for a Peanut Butter Chocolate Pie-ish looking thing and that was the magical moment I knew I'd serve up individual cups of rich chocolatey, peanut buttery, oreo goodness.  {<-- major run on sentence, I know. But describing these cups of glory isn't easy.}

Now one must be warned before attempting this no bake recipe - rich chocolate and peanut butter mousse layered between oreo cookies and mini peanut butter cups requires lots of "testing"and "tasting" along the way. ;)  Also, I wouldn't classify this as "healthy" as I do most of my recipes.  This is an all out sugar fest - one you may need a strong black cup of coffee to sip alongside just to balance the sweet party dancing it up in your mouth.  But I assure you, it's a winning recipe.  One your guests will be talking about for years to come...or so I'd like to think. 

-- And since I have my beautiful new laptop *giddy grin* I couldn't help but pretty up the recipe.  Enjoy! --
     

Let me know if you make them, I'd love to hear your thoughts!! 

      XOXO ~

- images via Danya Collyer.  Please do not share without written permission.  

Monday, June 3, 2013

Food : Fruity Ice Cubes


I just love fruit!  Especially now that so many of my favorites are in season right now.

I think I mentioned in my Mocha Frappuccino post, that I'm trying to be sugar free {not including the natural sugar of fruit of course}, so I've had to be creative when curbing that craving and satisfying that terrible sweet tooth!  

I've never been a big soda drinker, but I do like a sweet drink from time to time.  So to satisfy that desire for something sweet, I've started filling my ice trays with my favorite fresh fruits and berries and adding them to either plain water, or plain fizzy water.  It's so yummy!  

Not only does your drink look beautiful, but there's a fun, sweet treat awaiting you at the end of that glass. And if you want to take the benefits one step further, you're doing your body a favor - fruits and herbs have been known to help fight free radicals, clear your skin, sooth your digestive system, boost your energy, lower cholesterol and alkalize the entire body!  Why wouldn't you add fruit to your drinks?!

These are a few of my favorite combinations : 

Berrilicious
- Raspberries 
- Blueberries
- Strawberries

Island Delight
- Mango
- Pineapple
- Frozen in Coconut Water

Pucker Up!
- Mint
- Lemon

Just Peachy
- Mint
- Peach

Southern Gal
- Lemon
- Lime
- Rosemary

*Combine your ingredients with about 1 C of room temp water, mix well, cover and let flavors fuze in the fridge over night.  Fill your ice tray and let freeze.


The options are endless, so drink up!

XOXO


- image via Danya Collyer

What are your favorite combinations?  Leave a response in the comments below.

Tuesday, May 28, 2013

Food : Mocha Frappuccino


I've been on a no sugar diet with a girlfriend of mine and with all of this warm weather, a Starbucks Mocha Frappuccino is awfully tempting {but loaded with sugar}.  So I set out to create a "healthy" frapp of my own, and I'm so happy to say I succeeded!  

{I now wake up looking forward to my morning Mocha Frappuccino}


Mocha Frappuccino

  1. A Handful of Ice
  2. 1 Fresh Banana
  3. 1 Scoop Chocolate Protein Powder 
  4. 1 Shot of Espresso {or a highly concentrated amount of plain brewed coffee, or a 1t of instant coffee will do}
  5. 1/2 C Vanilla Coconut Milk
  6. 10 Dark Chocolate Chips
Combine all in a blender, blend and enjoy!!  

{Oh, and if you're really looking for a treat, top with your favorite whipped cream....I won't tell.}


XOXO

Tuesday, March 19, 2013

Breakfast Lox & Hash

So I've been in a smoked salmon kick these days.  Over toast, cheese and cucumbers, wrapped in my sushi or over my breakfast hash - I can't get enough of the stuff!  So this morning when my craving hit, I knew just what I was going to make, but first I have a story to share.

A few months ago, hubby and I ventured out to a cute little red cottage cafe for brunch.  To my dismay they were out of eggs, so no omelet for me.  This gfree girl has few options other than eggs when eating out for bfast, so you can imagine my disappointment when the waitress informed us of their outage.  She did, however, let me know that they had a special gluten free lox plate that morning and assured me it was far better than any omelet they could have made.  Left with no other options, I ordered the lox.  To my surprise, fresh lox spread over a bed of potatoes and cream cheese was quickly a new favorite!

Now my smoked salmon kick would not be complete without trying my hand at that delectable little dish I encountered at that quaint cottage cafe.  My version is a little different - and I'd like to think a tad bit healthier, but who's really keeping track here?  To be totally honest, after snapping a few pics, this plate was licked clean in a matter of seconds.  I utterly inhaled the stuff - and I have a feeling you will too!

Enough from me...here's the recipe.


Breakfast Lox & Hash

- 1 Small Package Smoked Salmon {or lox - whatever you desire to call it}
- 1 Bag Frozen Hashbrowns
- Nonfat Plain Greek Yogurt {or sour cream, if you wish}
- Capers
- Fresh Dill
- Salt and Pepper
  1. Cook hashbrowns according to package - salt and pepper to your liking.
  2. Transfer hash to your plate, spread 2-3 tablespoons of plain Greek yogurt over hash and layer salmon over top.
  3. Garnish with 1 tablespoon capers and fresh dill. Enjoy!
Totally simple right?  I'd recommend this one for breakfast guests.  It's easy, packed with flavor and totally impressive!


XO

Thursday, March 14, 2013

Warm Quiona & Roasted Veggie Salad

So on date night a few weeks ago, food-spiration struck as soon as my quinoa salad was placed on our table.  Warm and crisp, light yet substantial - such a nice change to my salad routine.  I knew it wouldn't be long before I would be recreating a version of my own.  Tired of hummus and rice bowls, this afternoon was the perfect time to give it a try.  {And now...I'm slightly obsessed.}

So here it is....let me know what you think!


Warm Quinoa & Roasted Veggie Salad


- 1 C Quinoa, rinsed
- 2 C Gfree Chicken Stock
- 1 t Salt
- 2 Cloves Garlic, minced
- 1 Roasted Red Bell Pepper
- 1 Can Artichoke Hearts, quartered
- 1/4 C Walnuts, chopped
- 1/4 C Dried Cranberries
- Arugula
- Goat Cheese
- Balsamic Vinegar & Olive Oil {or a vinaigrette dressing of your choice}

  1. Combine chicken stock, salt and quinoa in a small pan and bring to a boil.  Cover and let simmer on low for 15 minutes.
  2. Fold garlic, pepper, artichoke, walnuts and cranberries into cooked quinoa.  Salt and pepper to taste.
  3. Scoop quinoa mixture onto a bed of arugula and top with crumbles of goat cheese and drizzle dressing over top and dive in!


What do you think?  Do you love warm salads?


XO

Thursday, September 27, 2012

Food : Pumpkin Chocolate Chip Cookies

Pumpkin, pumpkin and more pumpkin!  I just love the stuff!  

I wait all year for fall to arrive so I can break out my Pumpkin Chocolate Chip Cookie {PCCC} recipe.  Pumpkin + Chocolate?!  It's divine.  


I wish I could tell you where I got this recipe, but sadly I cannot.  I've revised it a bit, but if it looks familiar and you know who deserves the credit, please let me know.  Until then, mystery PCCC recipe creator, you are genius!  I thank you from the bottom of my fluffy, fall-baking-enlarged behind.  

I have to say, it's been tricky converting this to my gfree satisfaction.  If you're a gluten consumer, I've included notes on how much flour to use.  If you're gfree as I am, use the measurements I provided - any more flour and they will be too dry. {Trust me on this one.}

Prepare to fall in love...and you're welcome to your personal trainer or gym buddy for encouraging the need for extra workouts.  ;)


Pumpkin Chocolate Chip Cookies


- 1 1/2 C Canned Pumpkin {use more and you get a more gooey, cake-like cookie, less and a more firm cookie}
- 3/4 C Sugar
- 1/2 C Oil
- 1 Egg
- 1 tsp Vanilla
- 1 1/2 C Gluten Free Flour Blend { I use 1/4 C Arrowroot Powder, 1/4 C Coconut Flour, 1 C Rice Flour.  If you like a firmer cookie, add an extra 1/4 C Coconut Flour.  I prefer the cake-like texture, but hubby likes the more cookie-like texture, so my flour ratio depends on who I'm making them for.}  For my gluten eating friends, use 2 C Regular Baking Flour
- 2 tsp Baking Powder
- 1 tsp Cinnamon
- 1/2 tsp Nutmeg
- 1/4 tsp Allspice
- 1/2 tsp Salt
- 1 tsp Baking Soda
- 1 tsp Milk
- 1 C Chocolate Chips  {I always add extra}
- Nuts {optional - I usually do without, but if you're a nut lover - go for it!}
  1. Preheat oven to 375 degrees.
  2. Dissolve baking soda in milk & set aside. 
  3. In a large bowl combine pumpkin, sugar, oil, and egg. Stir. 
  4. Add flour, baking powder, cinnamon, nutmeg, allspice, salt, vanilla and baking soda mixture. Mix well. 
  5. Stir in chocolate chips and then spoon onto parchment lined cookie sheet. 
  6. Bake at 375 degrees 10 to 12 minutes.  Let cool & enjoy! 
Happy Fall!!

XO

Wednesday, September 12, 2012

Food : All Things Pumpkin

I don't know about you, but I'm a fanatic about all things pumpkin!  Of course, along with everyone else, I'm thrilled about the return of the great Pumpkin Spice Latte, but I'm also excited about all of the pumpkin possibilities in the kitchen!

Pancakes, biscotti, ravioli, cookies - the possibilities are endless.  Pumpkin can go into just about anything.

I'm still working on trying my hand at my own gfree pumpkin creations, but I thought I'd inspire you via my internet pumpkin finds!


1 | 2 | 3 | 4 | 5 | 6
Are you salivating yet?  I am.

Fall is on it's way and I'm excited!

Are you a pumpkin fan?  If so, what's your favorite pumpkin laced recipe??


XO

Wednesday, August 29, 2012

Food : Cherry, Almond & White Chocolate Quinoa Cookies

Good morning PPS readers!

Danya asked me to do a guest post for her this week and I was absolutely thrilled! I am the Mrs. over at Desiring Providence, where I blog about family life, food, and adventures.You are welcome to check it out if you have the time!

I am passionate about kitchen creations, and have a special treat to share with you today.

After I gave birth to our son, I needed snacks on hand that would satisfy my hunger and provide a boost of energy for those nighttime feedings. These cookies came to mind and were the perfect addiction to my night time routine, providing important nutrients and a complete protein source, important for a healing body. The quinoa makes these cookies soft and chewy and adds a unique nutty flavor, while the cherries and white chocolate chips add a bit of sweet.

The best part about these cookies is they are really very versatile. Try mixing and matching with different nuts, dried fruits, and additions such as chocolate chips. Have fun with it and create to your heart's content (or your stomach's, for that matter!).


Cherry, Almond, White Chocolate Quinoa Cookies
Adapted from Krug the Thinker


- 1 1/2 cups wheat flour {A blend of coconut, rice flour & arrowroot powder could be substituted for my gfree friends}
- 1 tsp salt
- 1/2 tsp baking powder
- 1/2 tsp baking soda
- 1/2 cup unsalted butter at room temperature
- 1/4 cup of sugar
- 1/4 cup brown sugar
- 1/4 cup honey
- 2 eggs
- 1 1/2 tsp vanilla
- 1 cup cooked and cooled quinoa
- 1 cup old fashioned oats
- 1 cup dried cherries
- 1/2 cup chopped roasted almonds


  1. Preheat oven to 375 degrees. 
  2. Combine flour, salt, baking powder and baking soda in a separate bowl. Beat together butter, sugars, and honey until fluffy. 
  3. Add eggs, one at a time, and vanilla until batter is once again light and fluffy. Slowly beat in flour mixture. Stir in quinoa, oats, cherries, almonds and chocolate chips.
  4. Drop by rounded tablespoons onto parchment lined baking sheets. Bake for 13-15 minutes until golden brown in color. 
  5. Transfer to a rack to cool. 

Cookies can be stored for one week in an airtight container. They may also be frozen for portion controlled snacking! Just thaw desired number of cookies at room temperature and enjoy.

What kind of ingredients would you mix into these cookies?  Would love to hear.

Hope to see you over at Desiring Providence sometime!

Wednesday, August 22, 2012

Food : Loaded Breakfast Toast

It's no secret that breakfast is my favorite meal of the day!  From oatmeal + mixed nuts + dried fruit to greek yogurt + fresh fruit, berry pancakes to french toast, veggie omelets to portobello eggs benedict {remember this recipe?} - I'm a breakfast lover all around and I'll find any excuse to go out for breakfast or go all out in my own kitchen if I have to.  

Last week I was scouring my pantry for something yummy and behold the Loaded Breakfast Toast was born.  {That's what you call a bunch of stuff on top of toast and have no other name for it - ha!}  It was pretty stinkin yummy, so I had to share.  You can bet I'll be making this for my parents while they're in town....I hope you enjoy!!


Loaded Breakfast Toast
Serves 2

- 2 Pieces of Sandwich Bread {Of course I use my gfree version, usually Udis or Whole Foods brand}
- 1/2 c Sliced Mushrooms
- 1 c Fresh Leafy Spinach, rinsed and dried
- 2 Eggs
- 1 Avocado, sliced
- 1/2 T Butter {Olive Oil could be used instead}
- Salt 
- Pepper

  1. In a nonstick pan, over medium heat melt butter, add mushrooms and spinach, sprinkle with salt and saute.  
  2. Remove mushrooms and spinach from pan and cover to keep warm.  
  3. Add egg {I suggest one at a time} to same pan and fry till yolk is firm but soft enough to run when broken. (about 1 minute on each side)
  4. While egg is frying, toast your bread & lightly butter.
  5. Assemble : toast + mushrooms & spinach + egg + avocado + salt & pepper to taste.


{Every last bite was consumed - and quickly!}


Bon Appetit!

Wednesday, August 1, 2012

Food : Elderberry Syrup & Foods That Heal


My journey to heal my body was long, discouraging, and expensive.  In trialing hundreds of medical, natural, and folklore remedies to get well, I discovered breakthroughs but many setbacks about what truly has a positive benefit to health.  One of the natural remedies I was once convinced would cure my every ache was a sweet tasting powder taken with oxygenating water drops.  No luck with that one.  I experienced points of hopeless desperation and spent a lot of time on my knees seeking God for answers. Although my healing wasn't instantaneous,  I had a peace that God would lead me to what would heal me.   Through a journey I will never forget, God showed me which foods, herbs, alternative medicine techniques, and dietary models were in alignment with what He created to be beneficial to our bodies.

    One very important thing I learned on my journey is:

The most healing foods can be made in your own kitchen.

Think of your pantry, freezer, and refrigerator as a first line of defence when sickness hits.  Make garlic tea, take a spoonful of elderberry syrup, pull some homemade stock out of the freezer for soup.  Don't have any of those staples made?  Now is your opportnity to begin turning your kitchen into a virtual medicine chest.

Here are 3 easy steps to get you started.

  
1. Homemade broth:

                           {Beef broth labeled and dated ready to be refrigerated or frozen for later use.}   

Next time you buy a rotisserie chicken, toss the meat picked carcass in the crockpot with veggie scraps and cover with water.  Cook it on low for 8-12 hours while you sleep.  The next morning strain the broth, trash the scraps and put the broth in jars to be refrigereated or frozen.  Soup can now be ready in 20 minutes once you have this step down. You can also make broth by simmering the bones and veggie scraps on the stove top as well.   During the week while I'm cooking, I save vegetable scraps in a ziplock bag just for broth making.  Examples include the tops and bottoms of carrots, celery, onions, garlic, or parsley.  You can also buy stock bones from your butcher or local grocery store.  Bones from organic fed animals such as grass-fed beef and pastured chickens will provide an even more nutrient dense broth than conventionally raised animals.

Chicken, beef, or fish broth is rich in minerals such as calcium, phosphorus, silicon, magnesium, and sulfur. It also contains trace minerals that are easy for the body to absorb. Broth also has natural gelatin and collagen which are excellent for healing inflammation in the body as well as making your skin look beautiful. The glycine in the gelatin has even been shown to help with liver function.  Store bought broth does not have the same healing effect as the homemade variety, so whip up a batch on the weekend so you can have broth throughout the week or frozen for a later use.

       
2.  Garlic Tea

  As for garlic tea, I make it any time anyone in the house gets the slightest sniffle or upper respiratory tickle.  I've been known to drink 2-3 cups a day when I feel a cold coming on or when my co-workers have all come down with something.  Surprisingly though, it does not taste like garlic: the lemon juice takes over and it tastes like lemon water with honey.  This tea is not only great for viral infections but it is also anti-bacterial, anti-fungal, detoxifying, and calms the digestive system.  Once made though, it doesn't keep for more than 2 days in the fridge.  Drink up and share with the family!  Here's an easy recipe that can be made in 20 minutes.

3. Elderberry Syrup {Recipe below}:

Elderberry syrup is great to have on hand to prevent colds, sorethroats, or any virus. It is both anti-inflammatory and an antioxidant. You can buy elderberry syrup made with honey at the local healthfood store (I won't tell), but it is much cheaper to make st home. Take one to two teaspoons at the first sign of a cold, sore throat, flu or other viral illness.  You can also take 1 tsp daily as a prevention.   This is a staple to have in your healing kitchen repertoire.   I found fresh berries at our farmers market but you can also buy them dried here. This tonic is great for kids too, provided they're not babies under one year of age.


The above ideas are easy entry level ways to begin using your kitchen as a medicine cabinet.  We can choose to heal with every morsel that crosses our lips.  It's really that simple.  Besides, your great grandmother would approve.


Elderberry Syrup


I had two cups of fresh elderberries, so I left one batch plain and added sliced fresh ginger to the second.  Either way you make it, this is one immune boosting tonic!

- 1 cup fresh or 1/2 cup dried elderberries
- 1/2 inch slice fresh ginger (optional)
- 3 cups water
- 1 cup raw local honey


  1. Heat the berries, ginger (optional) and water to a boil, then reduce to simmer for 30-45 minuets.
  2. Remove ginger.  Mash the berries, strain, and add honey. 
  3. Bottle and store.  Keeps in the refrigerator for 2-3 months.

What else can you do with Elderberry syrup besides taking it each day as a flu prevention or taking it at the onset of a cold?

  • A sorbet base
  • Ice cream topping
  • Drizzled on your pancakes
  • Add a few tablespoons to frosting for cupcakes.
  You can also make this refreshing lime and elderberry cooler!


Elderberry & Lime Cooler
Serves 1 {can be doubled, or tripled}

- 3 tsp Elderberry syrup
- 3 drops stevia {or 1 tsp honey}
- 1 tsp lime juice
- 1 cup water
- Ice Cubes

  1. Combine all ingredients in a 4 ounce tumbler, stir, and enjoy!

I'd love to hear from you!  Leave a comment below telling us what steps you have done to make your kitchen/home a healing place. 
- Melanie

This post linked with Slightly Indulgent Tuesday, Allergy Free WednesdayHearth and Soul Hop,and Keep it Real Thursdays.


- images via Melanie

Wednesday, July 25, 2012

Food : 10 Minute Baked Potato

So a few days ago I had a hankering for a baked potato.  I remembered that beautiful sweet potato I bought over the weekend and thought I'd make myself a sweet savory treat for lunch.  In about 10 minutes I had a glorious Maple Glazed Sweet Potato sitting on my plate!  


How did I do that?  Let me show you....

My mom shared this handy trick with me a few years ago and I haven't baked a "traditional" baked tater since!  


  1. Grab a potato. {I use russet or sweet potatoes for this method.  "Baking" time may vary according to the size of your potato.  We'll get there in a minute.}
  2. Wash it well.
  3. Poke {carefully} a few times with a knife or fork.
  4. Pop it in the microwave on high for 5 minutes.  {I do 6 or 7 minutes for a large potato...the one below was considered large.}
  5. Carefully {its hot!} and snugly wrap it in foil and let sit for another 5 minutes {again, I let it sit another minute or two if it's large}
  6. Unwrap & voila!  You have a baked potato in about 10 minutes!  :) 

For a regular russet potato, I like to drizzle olive oil and a dash of salt over the skin before I wrap it in foil.

Maple Glazed Sweet Potato


  1. Bake a large sweet potato.
  2. Slice into 1/2 in slices and stack.
  3. Sprinkle with cinnamon, nutmeg and a dash of salt.
  4. Drizzle warm maple syrup over top.


Happy "baking"!  


- images via danya collyer

Wednesday, July 11, 2012

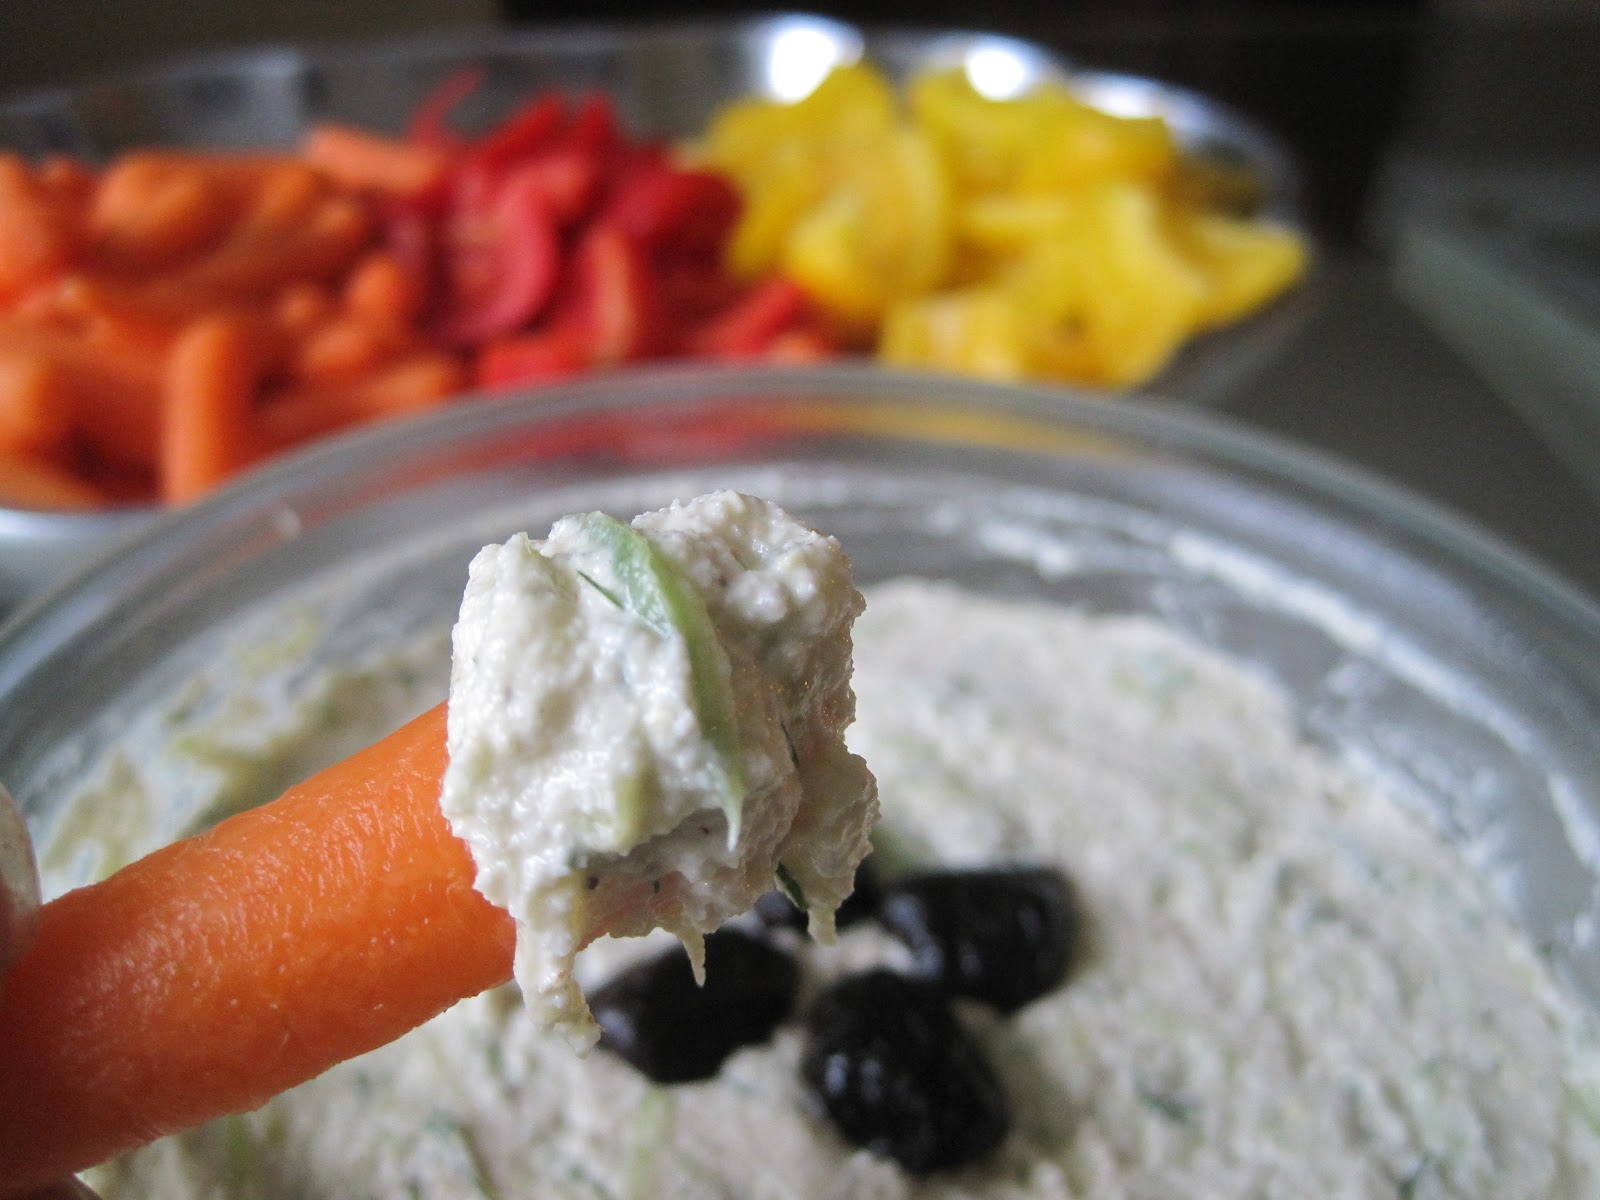
Food : Tzatziki {Dairy Free}


Hi friends!

Our local farmers market has me jumping for joy every weekend with awesome new ingredients to play with.  I've been buying figs from the sweetest old lady with hopes of turning them into fig cookies or a sweet summer jam, but alas they have been eaten way too fast for any such creations.  I did manage to restrain myself from making more lacto-fermented pickles with my bounty of cucumbers so we could enjoy this versatile dip.

In case you haven't noticed, I have an obsession with turning my once beloved Greek recipes into modern healthy versions.  Its quite common during the summer to find any one member of my family chowing down on a Gyro (YEER-oh).  The Greek sandwich that changed the world is a pillowy soft flat bread wrapped around tender lamb, lettuce, tomato, onion, and slathered in Tzatziki ( dza-DZEE-kee ).  The flavor combination of the sandwich has been forever engraved in my brain even though it's been years since I've actually taken a bite.  Since swearing off gluten and dairy the gyro of my childhood would have to be just a memory.  That is, until I realized with a few tweaks to my pine nut cheese that I may be able to re-create the faint memory of the creamy garlic spread from my childhood.

Hard work pays off. 

This is the dip dreams are made of.

Tzatziki

This creamy garlic dip can be a great vehicle for eating more veggies.  It goes great with chips too, although my favorite use is spreading it onto sandwiches or adding a dollop to the protein of your choice.  

 2 medium seedless cucumbers, peeled and grated (about 2 cup)
1 1/4 cups pine nuts
 2 garlic cloves
1 T olive oil
2 T freshly squeezed lemon juice
1/2 tsp salt
1 T chopped fresh dill
kalamata olives for garnish

1.  Soak pine nuts in cold water for 20 minutes. Sprinkle grated cucumbers with a few teaspoons of salt  until some of the liquid is released. Squeeze any excess moisture from grated cucumber w/ a kitchen towel and add to a medium sized bowl.
2.   Rinse pine nuts and add to bowl of food processor along with garlic, olive oil, lemon juice, and salt.  Puree until well blended, adding more lemon juice to help the food processor along if needed.  Taste and add salt, lemon, or pepper to your liking.
3.   Stir pine nut dip and dill with grated cucumbers and chill until ready to serve.  Top with kalamata olives (optional) 


Delish!  Enjoy!

- Melanie


Related Posts Plugin for WordPress, Blogger...
©Pink Peony Style - Designed by BDD